Publishing and Hosting Your Site in Relume Publish
By the end of this doc, you'll be able to:
- Understand what happens when you publish a site in Relume Publish
- Review your site's readiness score and Lighthouse scores before and after going live
- Find where to upgrade your hosting plan when you're ready
Before You Begin
Before getting started, make sure you have:
- Owner, Admin, or Editor access to the project.
How to Publish Your Site
Click Publish in the top-right corner of your project to start the publish flow. It walks you through 3 steps before your site goes live.
Step 1 of 3: Domains
- Review Your site URL. Every site gets a free address on
relume-staging.ioas soon as you create it. - Click Add custom domain if you want to publish to your own domain instead.
- Click Continue.
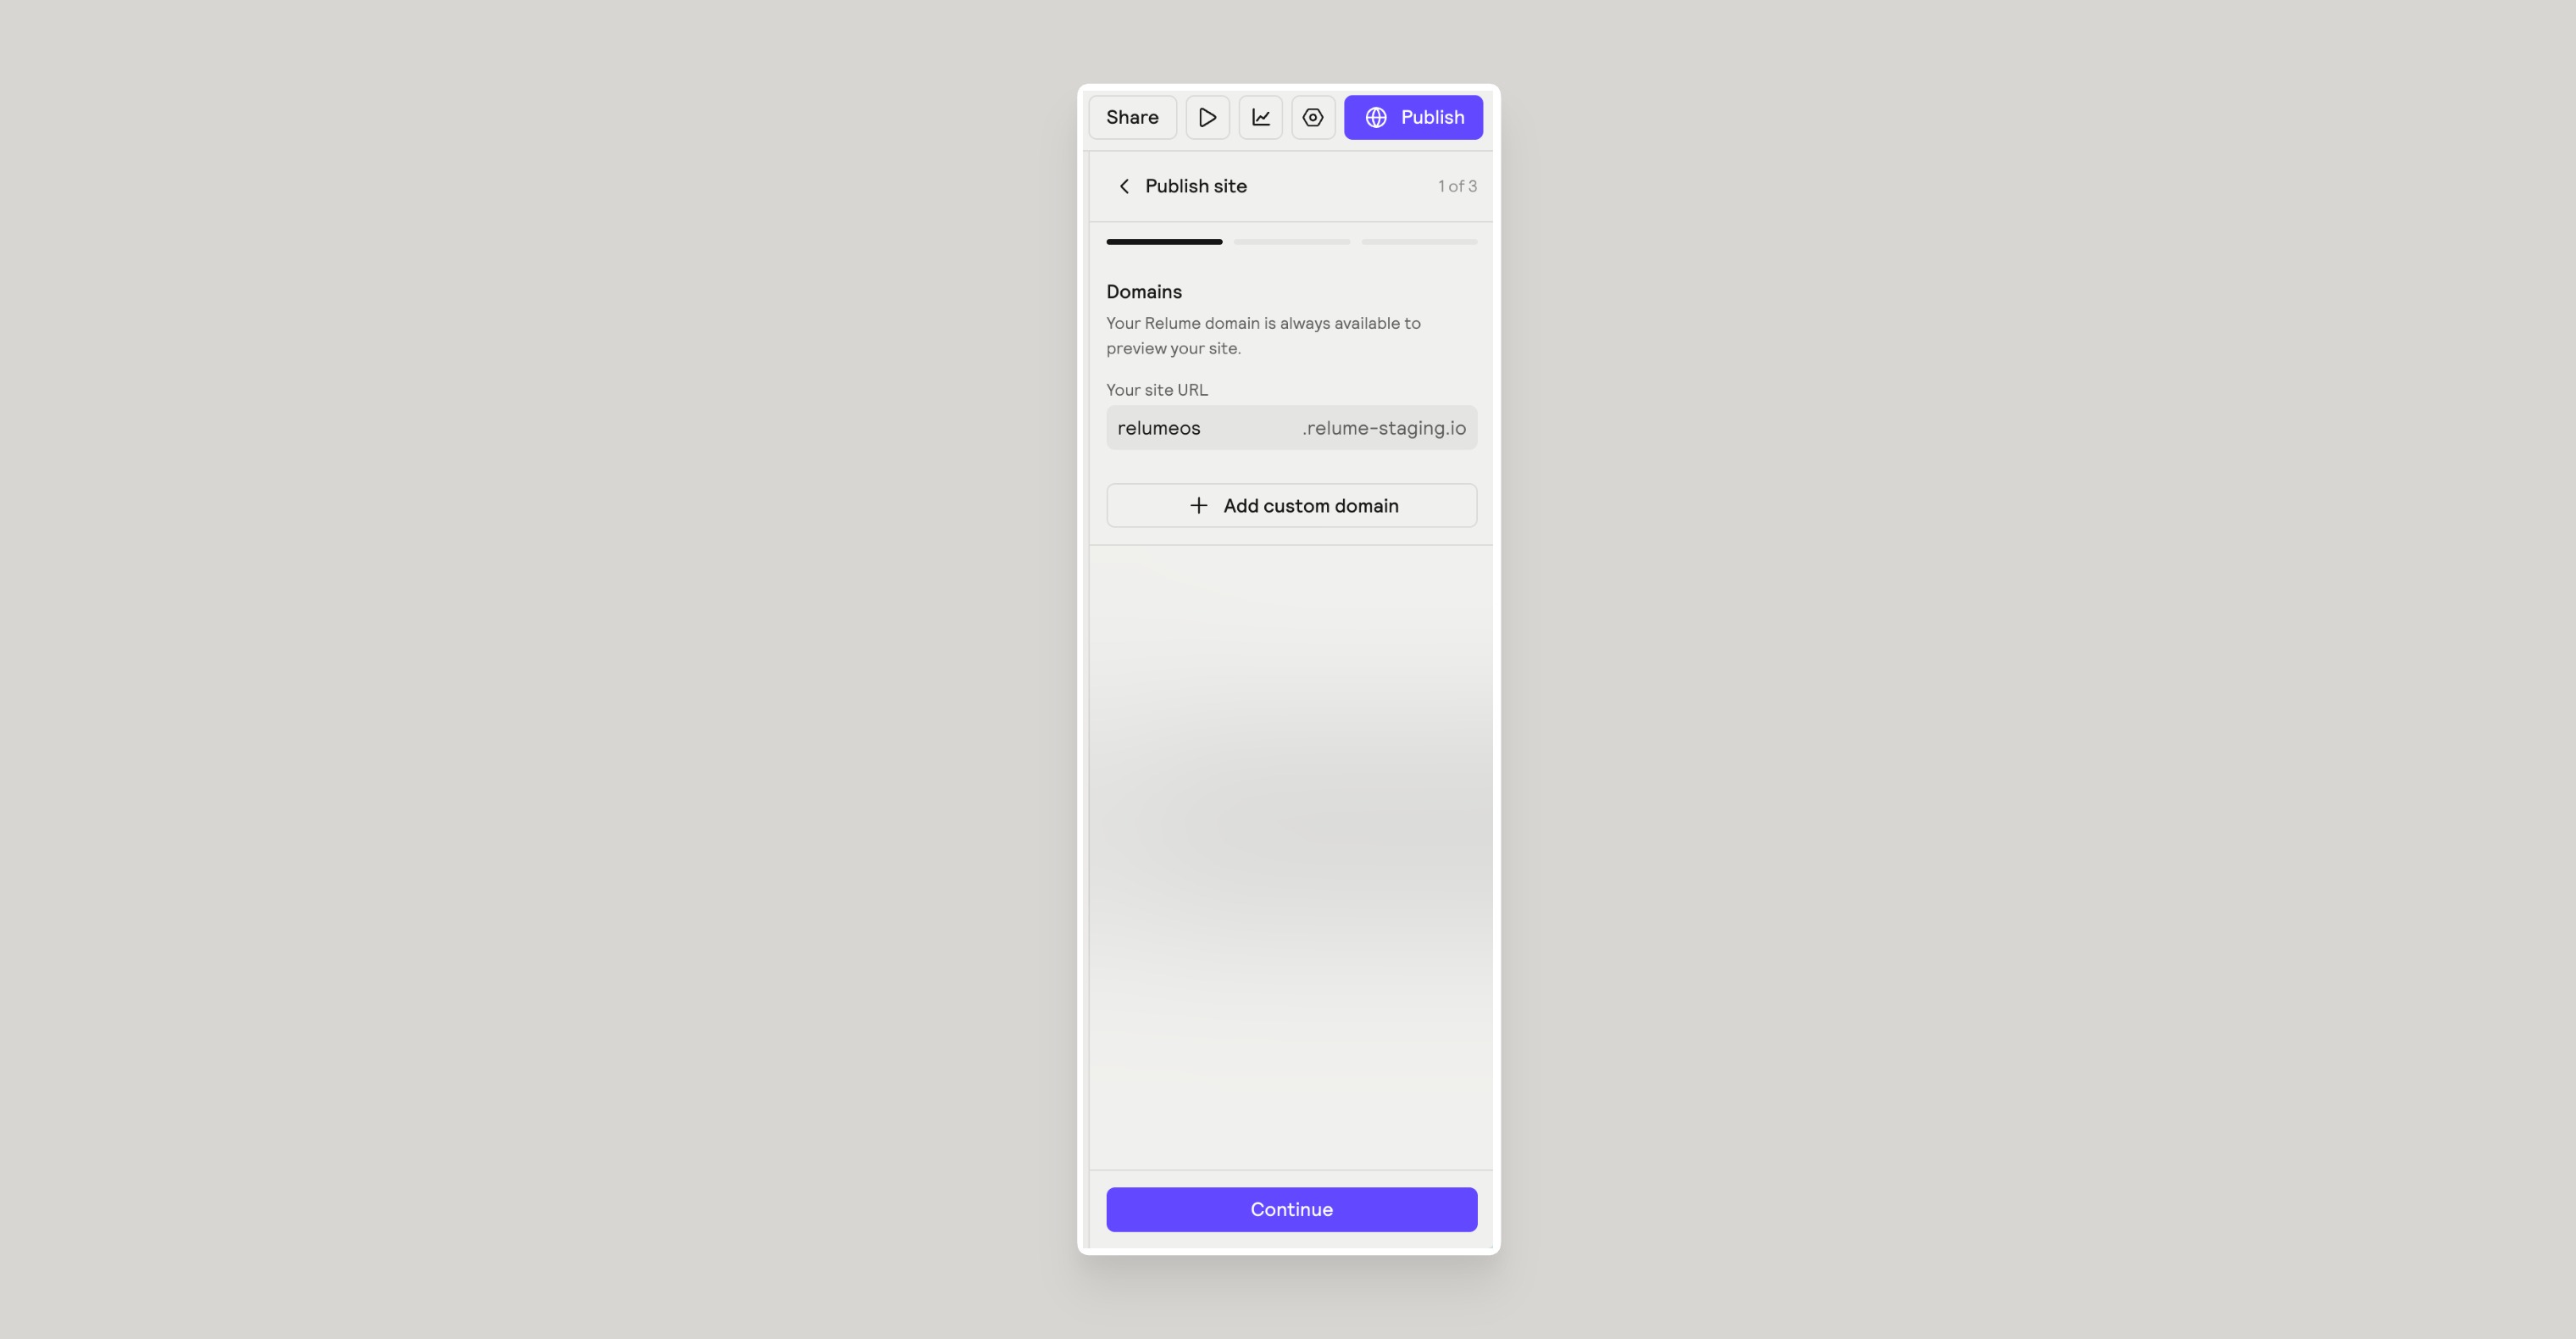
Your free relume-staging.io URL stays available even after you add a custom domain, so you always have a working link.Step 2 of 3: Help People Find Your Site
This step sets how your site appears in browser tabs, shared links, and search results.
- Review your Browser icon (favicon) — this is what shows up in browser tabs and bookmarks.
- Review the Social preview — this is what your site looks like when someone shares your link on social media.
- Review the Search appearance — this is how your site's title and description show up in search results.
- Click Continue.
.jpeg)
Relume generates your favicon, social preview, and search appearance automatically.
Step 3 of 3: Review Site Health
Before you publish, Relume checks your site is secure, responsive, accessible, and ready to go live.
- Review each item in the checklist. A checkmark means it's ready, and a warning icon (⚠️) means it needs your attention.
- Click Fix issues with agent to have Relume AI fix flagged issues for you, or fix them yourself and click the refresh icon to re-run the check.
- Click Publish once you're ready.
.jpeg)
A lower readiness score doesn't stop you from publishing. It flags suggested improvements.
Your Site Is Live
Once publishing finishes, you'll see a confirmation with your live URL and your site's Lighthouse scores for Performance, Accessibility, Best Practices, and SEO.
.jpeg)
Understanding Your Hosting Plan
Every site you publish has its own hosting plan, separate from your account's AI usage plan. All new sites start on the Free plan.
- Go to Account Settings.
- Click Plans & hosting in the left sidebar.
- Find your site under Launch Plans to see its current plan, included usage, and site URL.
- Click Upgrade or change plan and select how many monthly pageviews you need in the Launch Plan.
.jpeg)
Your hosting plan is separate from your account's AI usage plan. Upgrading one doesn't affect the other.
Need Support?
Join Our Community
Learn from fellow Lumers or showcase your work with our community of 10k+ members.
Get Support
We've got your back. Get your questions answered.
We typically reply in 24 hours or less.

