How to generate images in Relume Studio and add them to your site
By the end of this doc, you'll be able to:
- Generate an image that uses your Style, Characters and Scene together.
- Choose the right aspect ratio for where the image will go on your page.
- Write prompts that leave room for text on your page.
- Add Studio images to your Publish site from the library.
Before You Begin
- A Relume Publish Workspace plan.
- The Style, Characters and Scene you want to use. Styles can be your own or from Explore.
What Is the Composer?
In Relume Studio, the composer is where you generate images. Select a Style, Characters and a Scene, describe what you want, and Studio creates an image that respects all three at once. That's what keeps every image on brand, with the same look, people and place each time.
Every image you generate syncs to your Publish projects automatically. There's no need to download, upload or rename files.
How to Generate an Image
The composer may already show the Style you used most recently. Check each dropdown before you generate, so the image uses the right building blocks.
Set Up Your Image
- Click Create in the left sidebar.
- Click the Style dropdown and select a Style.
- Click the Characters dropdown and select one or more Characters.
- Click the Scene dropdown and select a Scene, or select None.
- Click the aspect ratio setting, like 16:9, below the text box.
- Select the aspect ratio that fits where the image will go on your page.
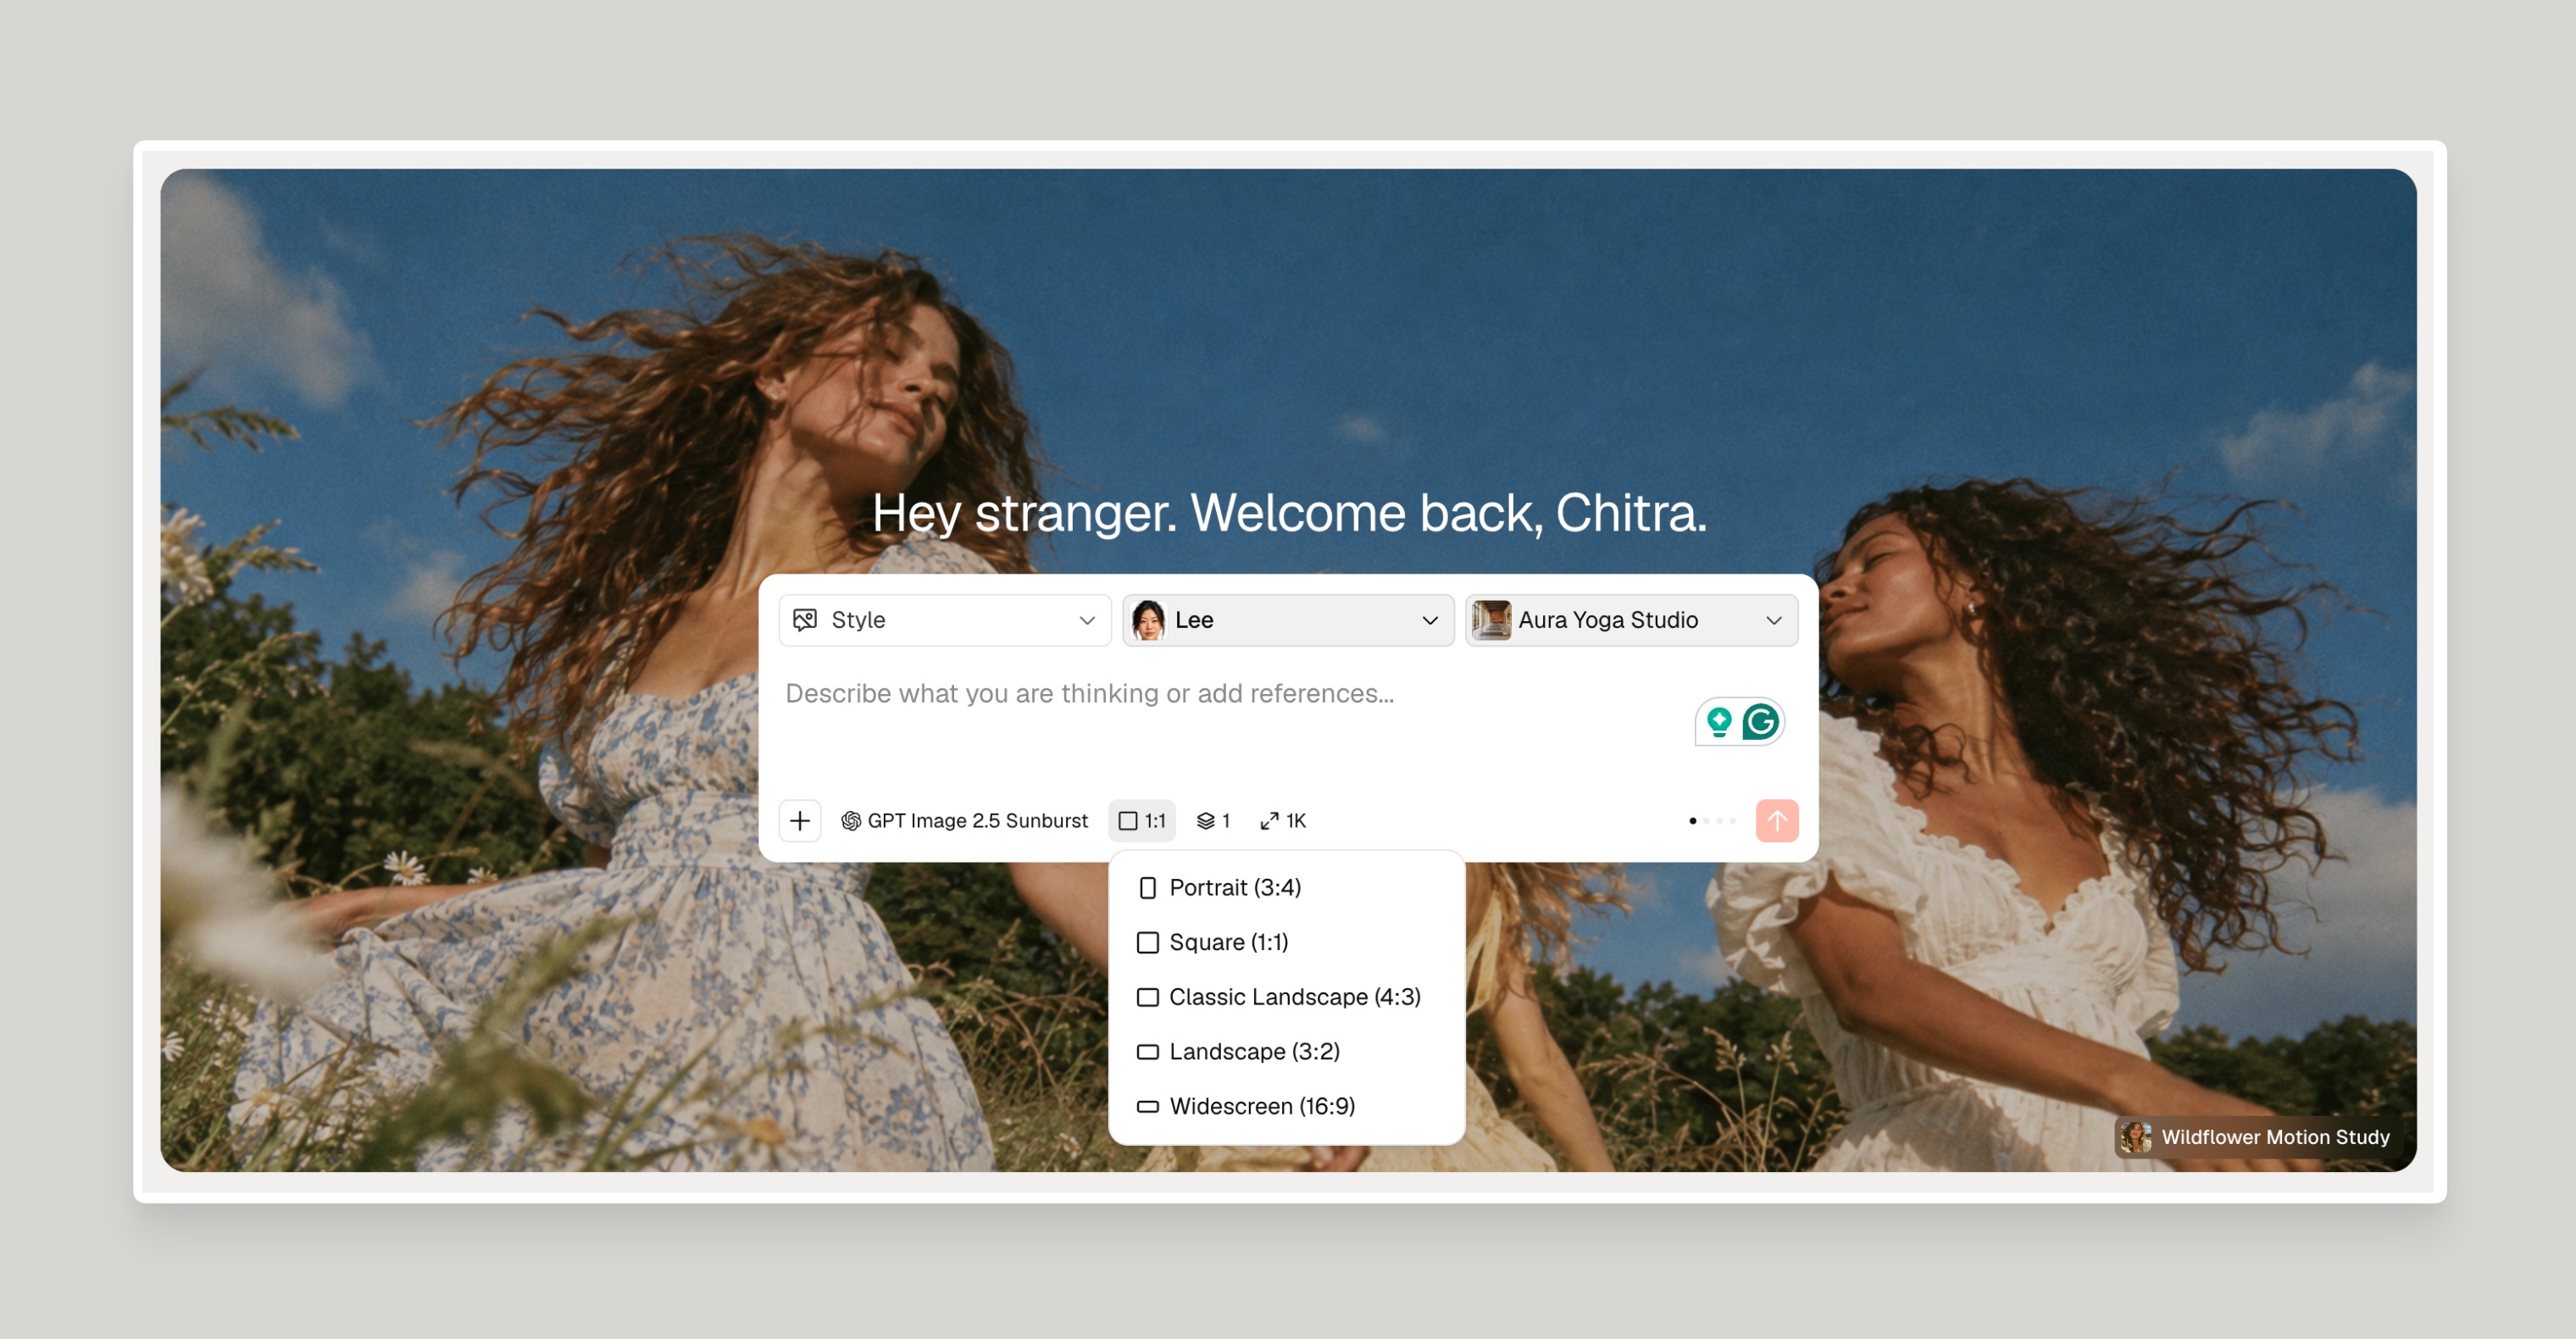
Describe and Generate Your Image
- In the text box, describe the image you want, like
Students in a yoga pose in the studio. - Click the arrow button to generate your image.
- Click the finished image to view it.
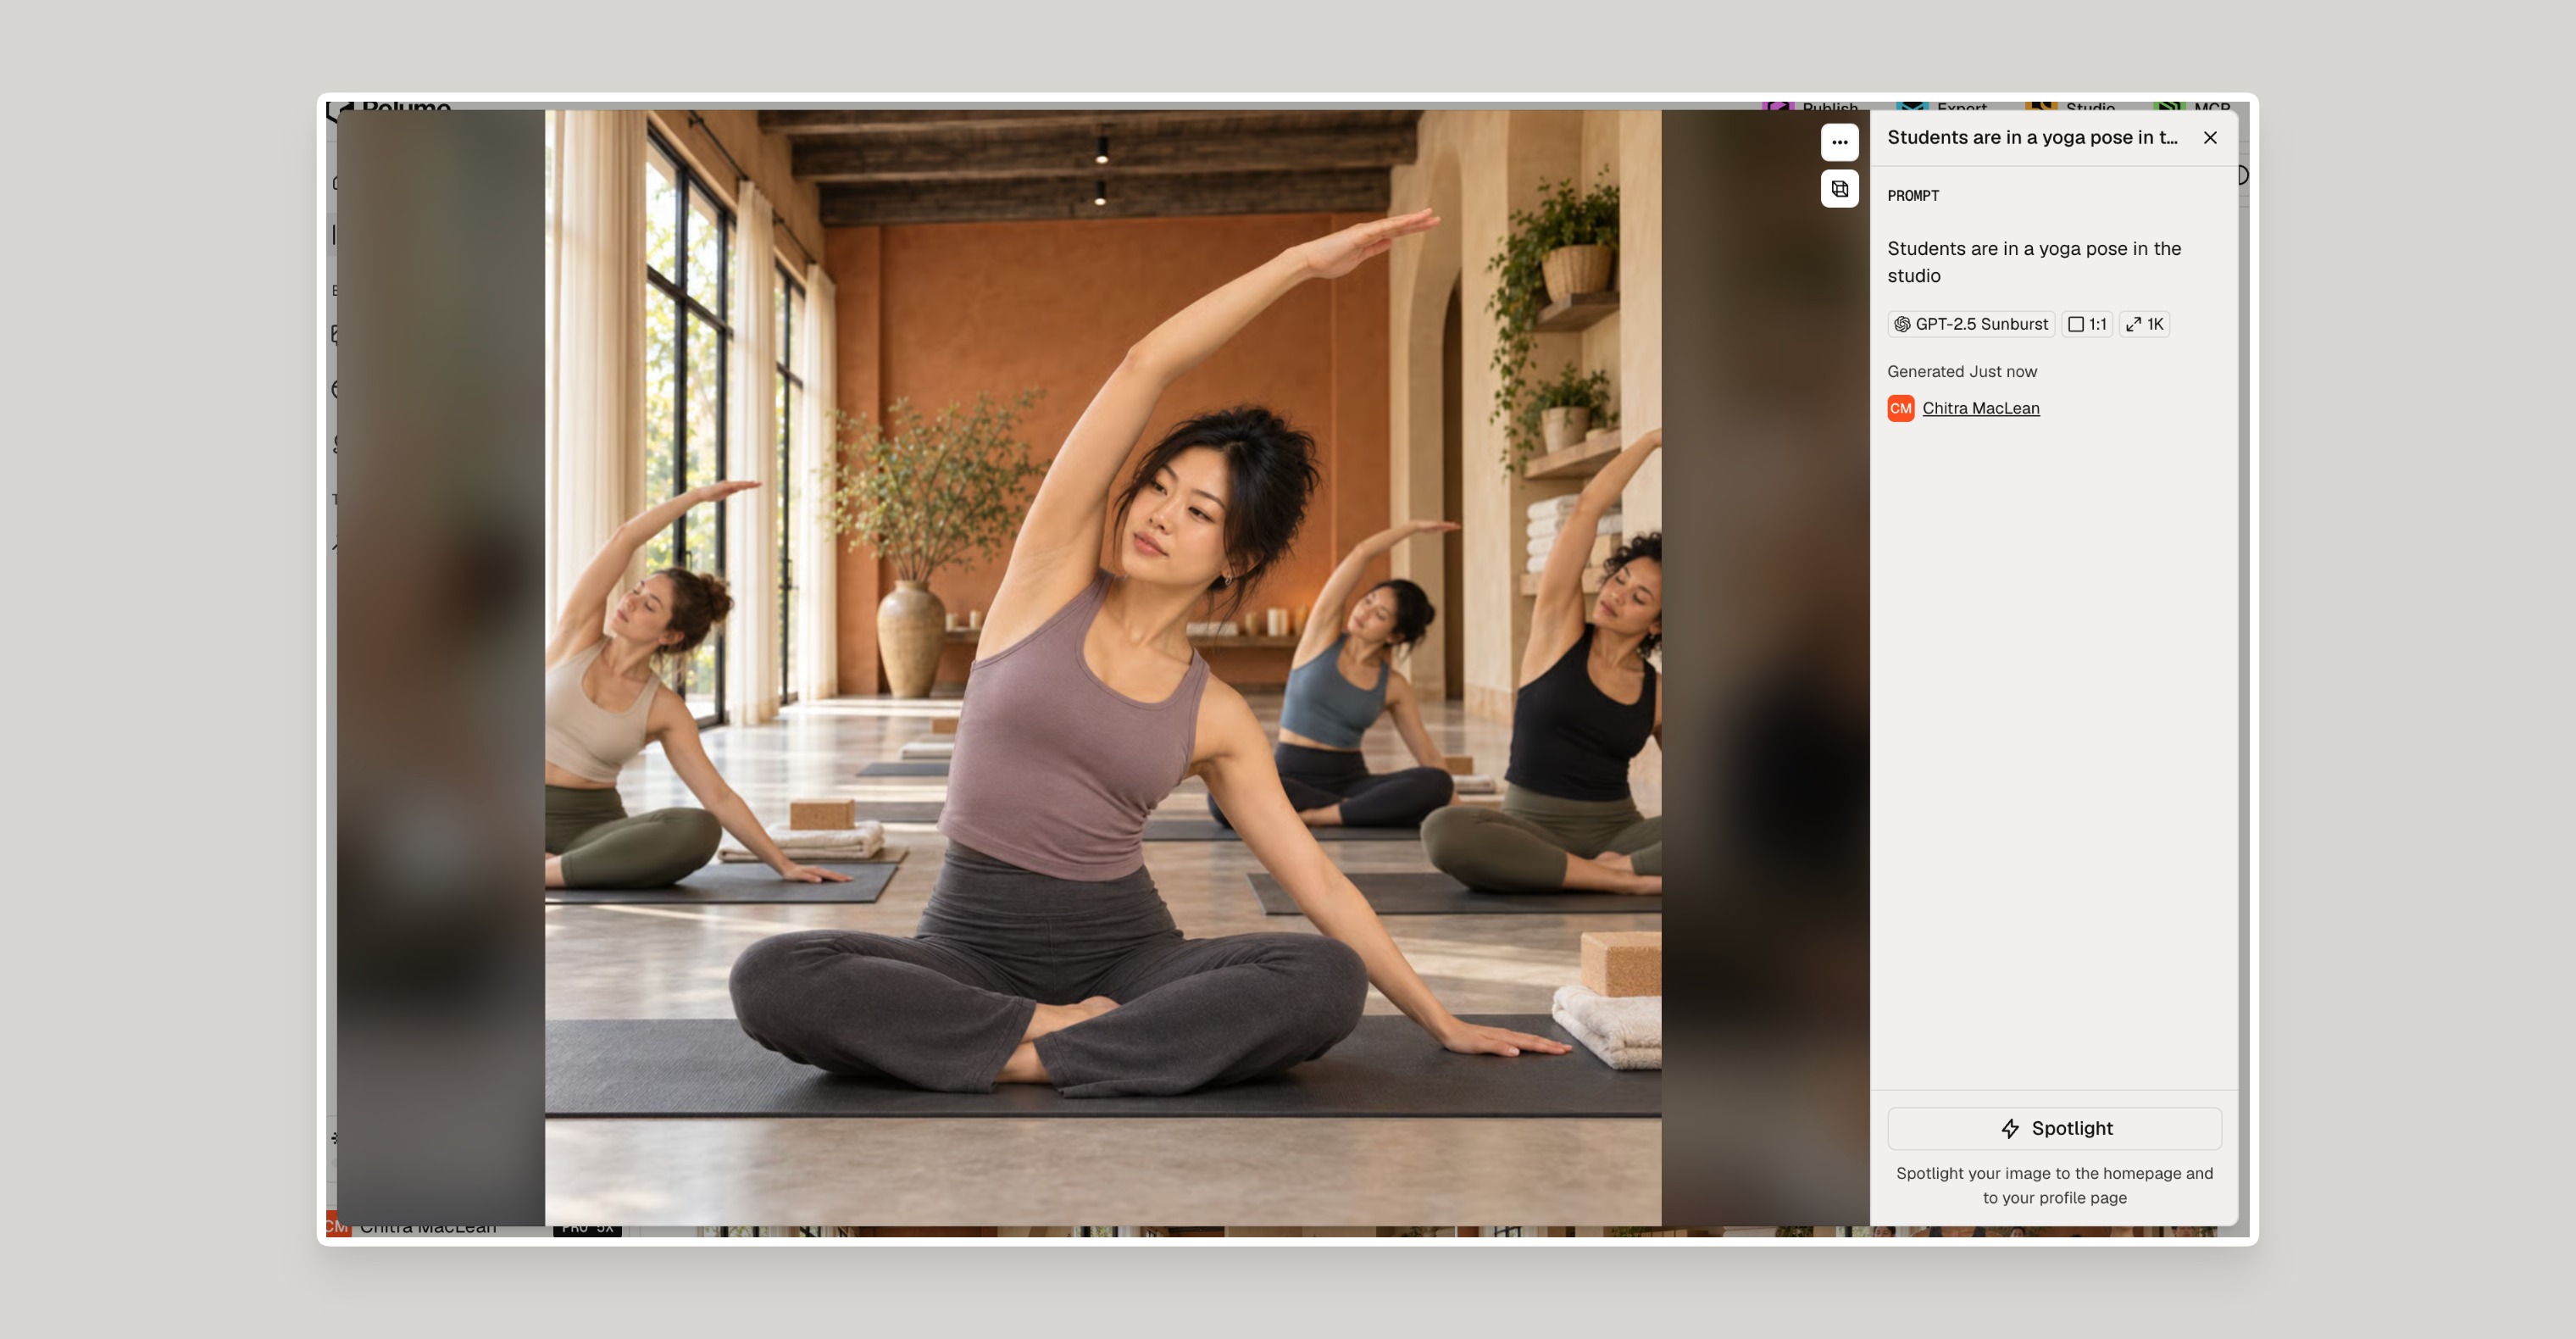
When you open an image, the panel on the right shows the prompt you used, its aspect ratio and resolution, when it was generated and who generated it.
Plan for your page layout in your prompt. If text will sit on one side of a hero image, say so, like put them on the right and keep the left minimal. This leaves a clear area for your heading.Add Studio Images to Your Publish Site
Your Studio images are already waiting in Relume Publish. There are two ways to add them to a page.
Add an Image From the Library
- Open your project in Relume Publish.
- Click Library in the left sidebar.
- Click the Studio tab.
- Drag an image onto your page.
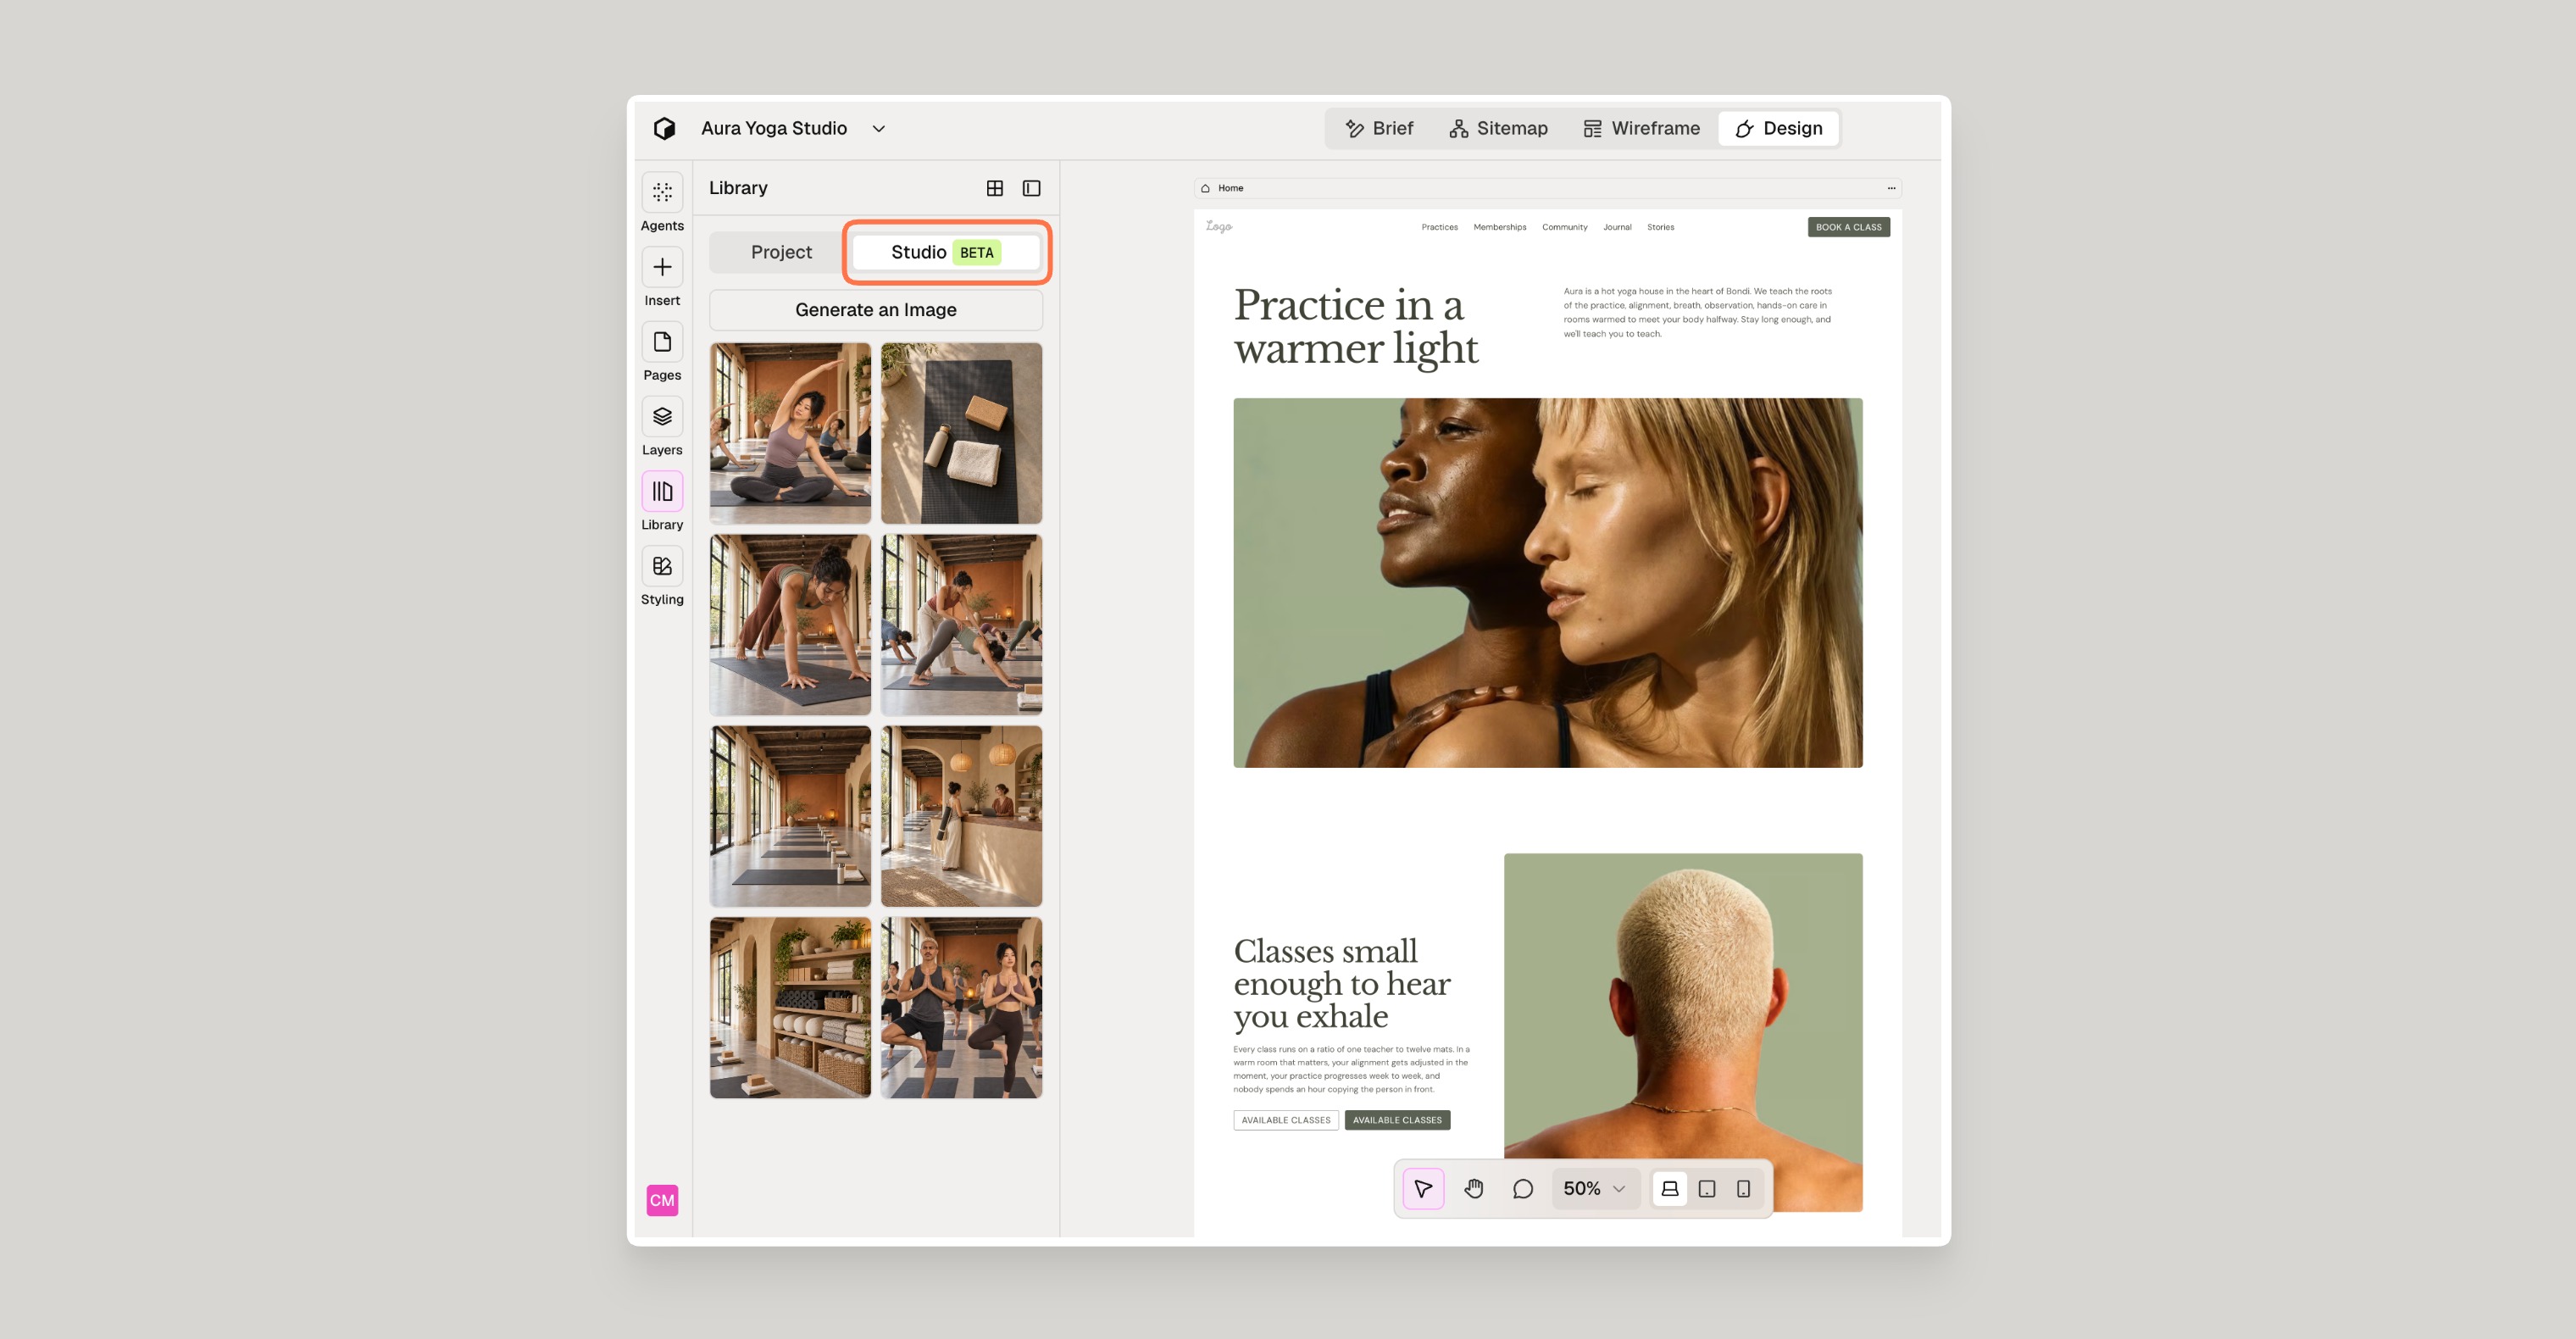
Replace an Existing Image
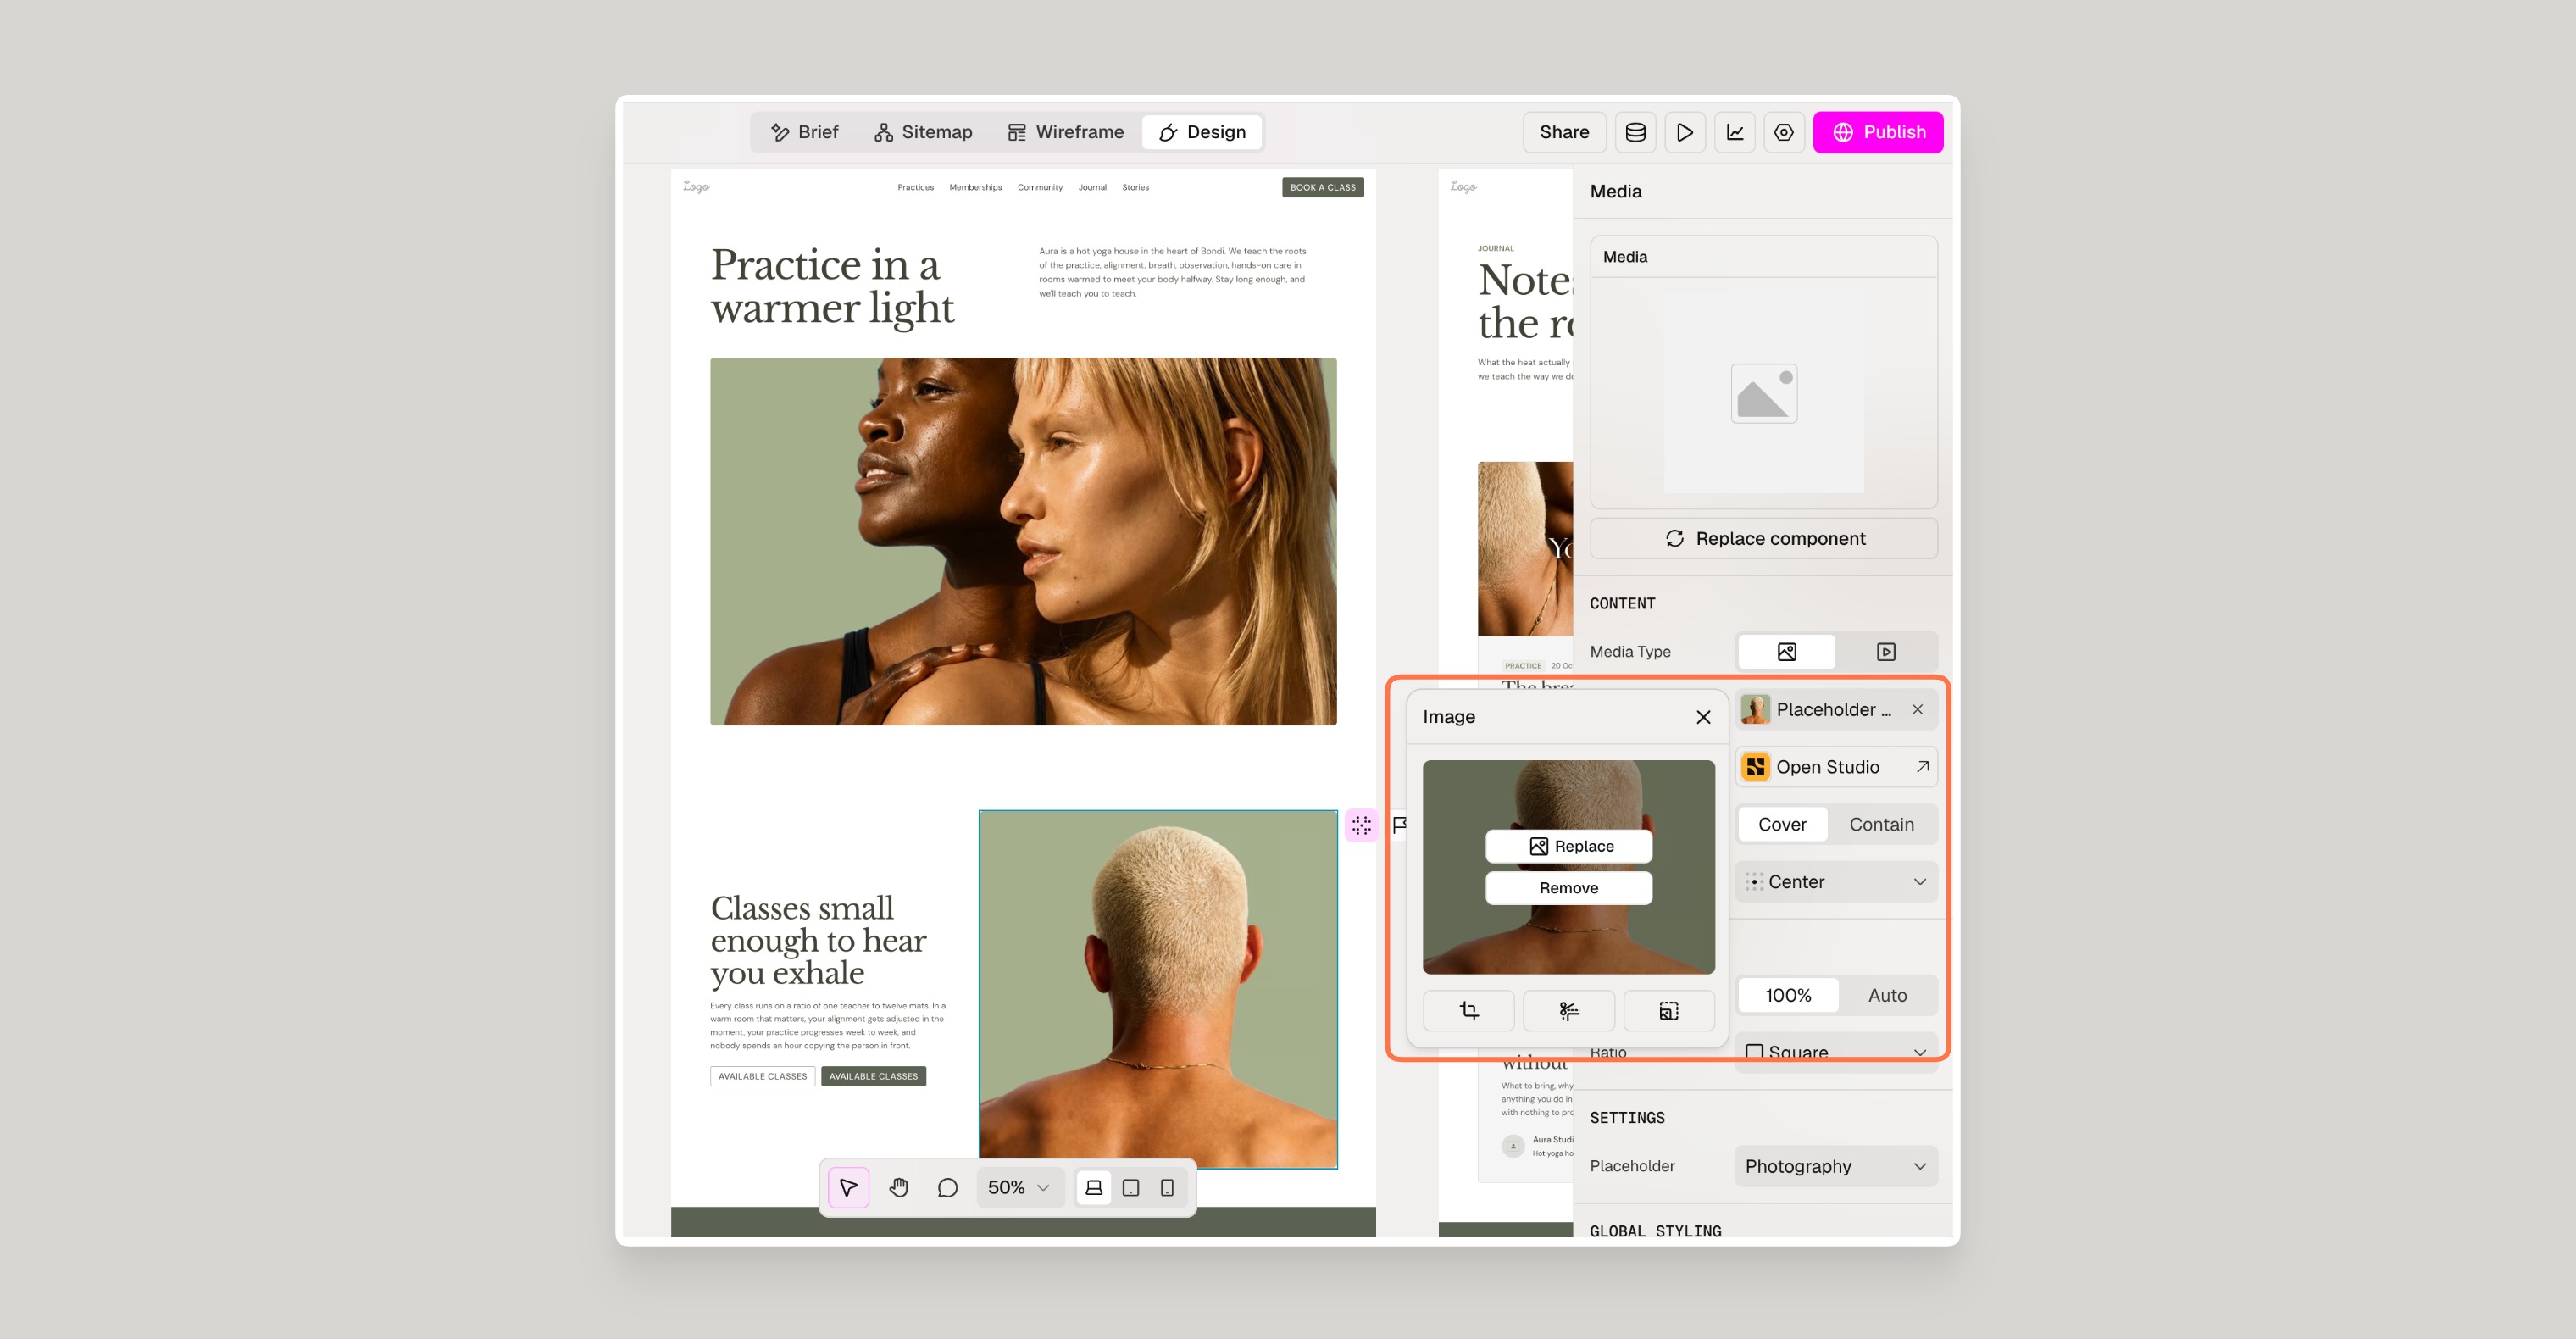
- Select the image on your page that you want to replace.
- In the right panel, click the image name next to Image.
- Click Replace.
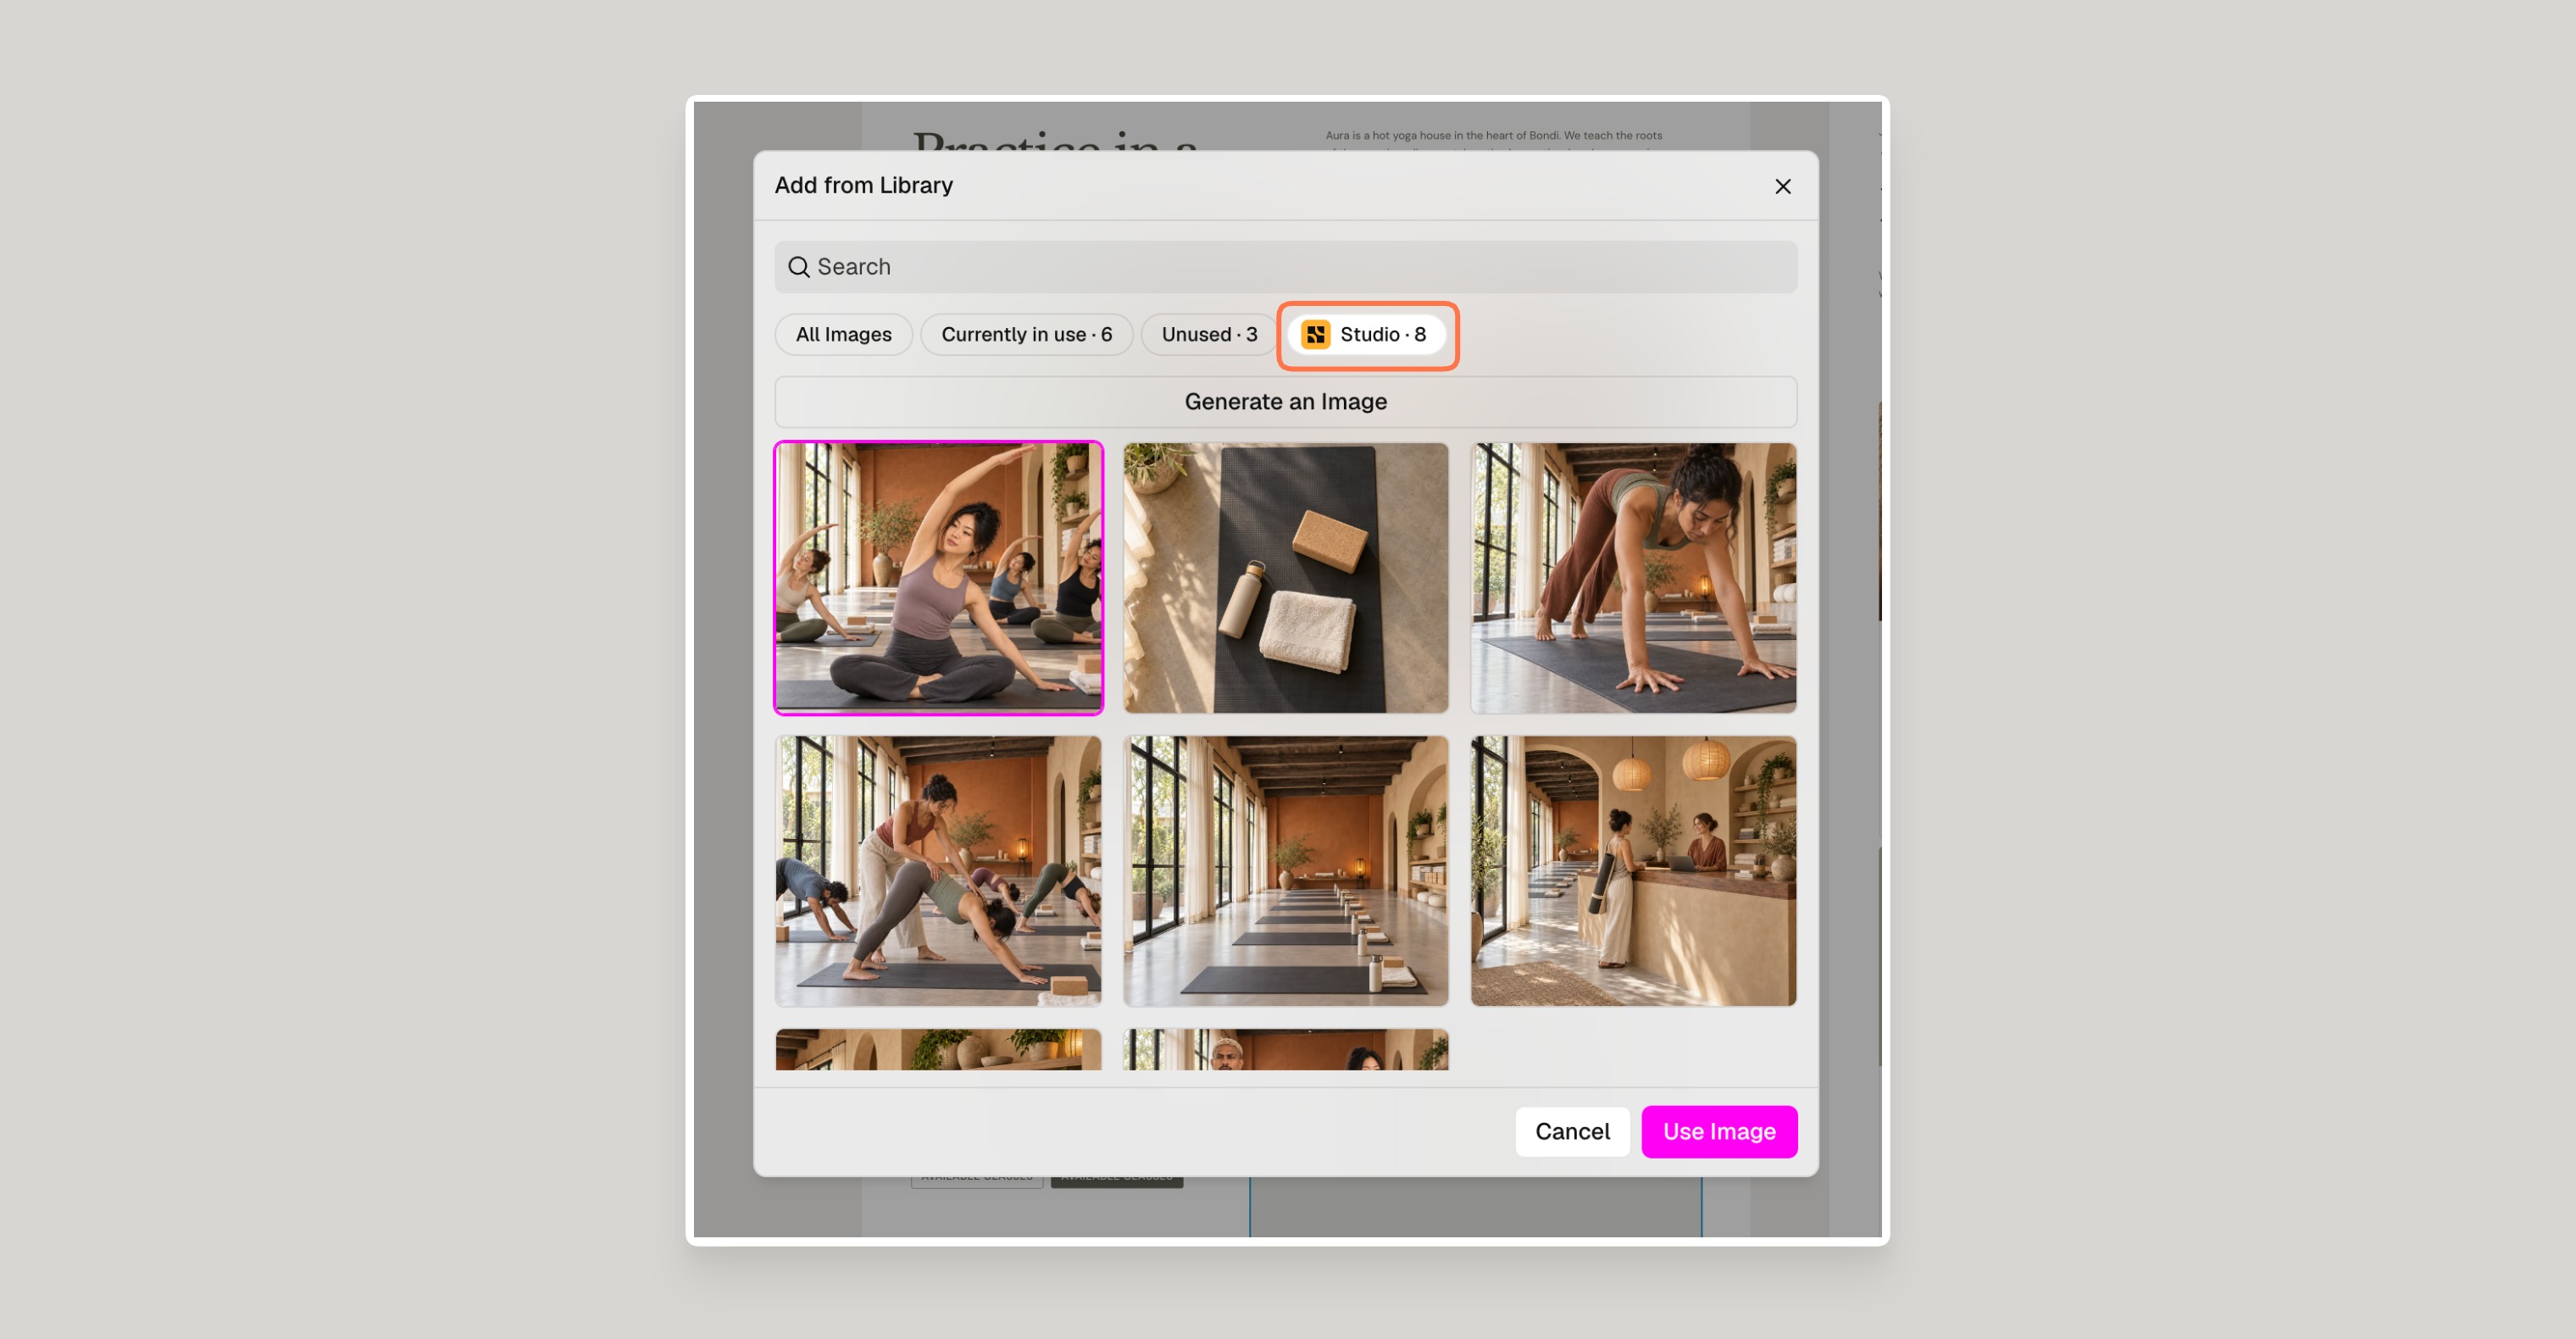
- In the Add from Library window, click the Studio filter.
- Click the Studio image you want to use.
- Click Use Image.
Need Support?
Join Our Community
Learn from fellow Lumers or showcase your work with our community of 10k+ members.
Get Support
We've got your back. Get your questions answered.
We typically reply in 24 hours or less.

