How to create Characters and Scenes in Relume Studio
By the end of this doc, you'll be able to:
- Understand how Characters and Scenes keep people and places consistent
- Create a Character from photos of a real person
- Choose whether Studio can change a Character's clothing
- Create a Scene from a photo of a real space
Before You Begin
- For a Character: up to 3 photos of the person, ideally a clear face shot and a full-body shot
- For a Character: the rights and consent to use those photos, whether they're of you or of your client
- For a Scene: a photo of the space you want to lock in
What Are Characters and Scenes?
In Relume Studio, Characters and Scenes put the real people and places behind your business into your images. Instead of stock photos or AI faces that change in every shot, you get you, in your space, every time.
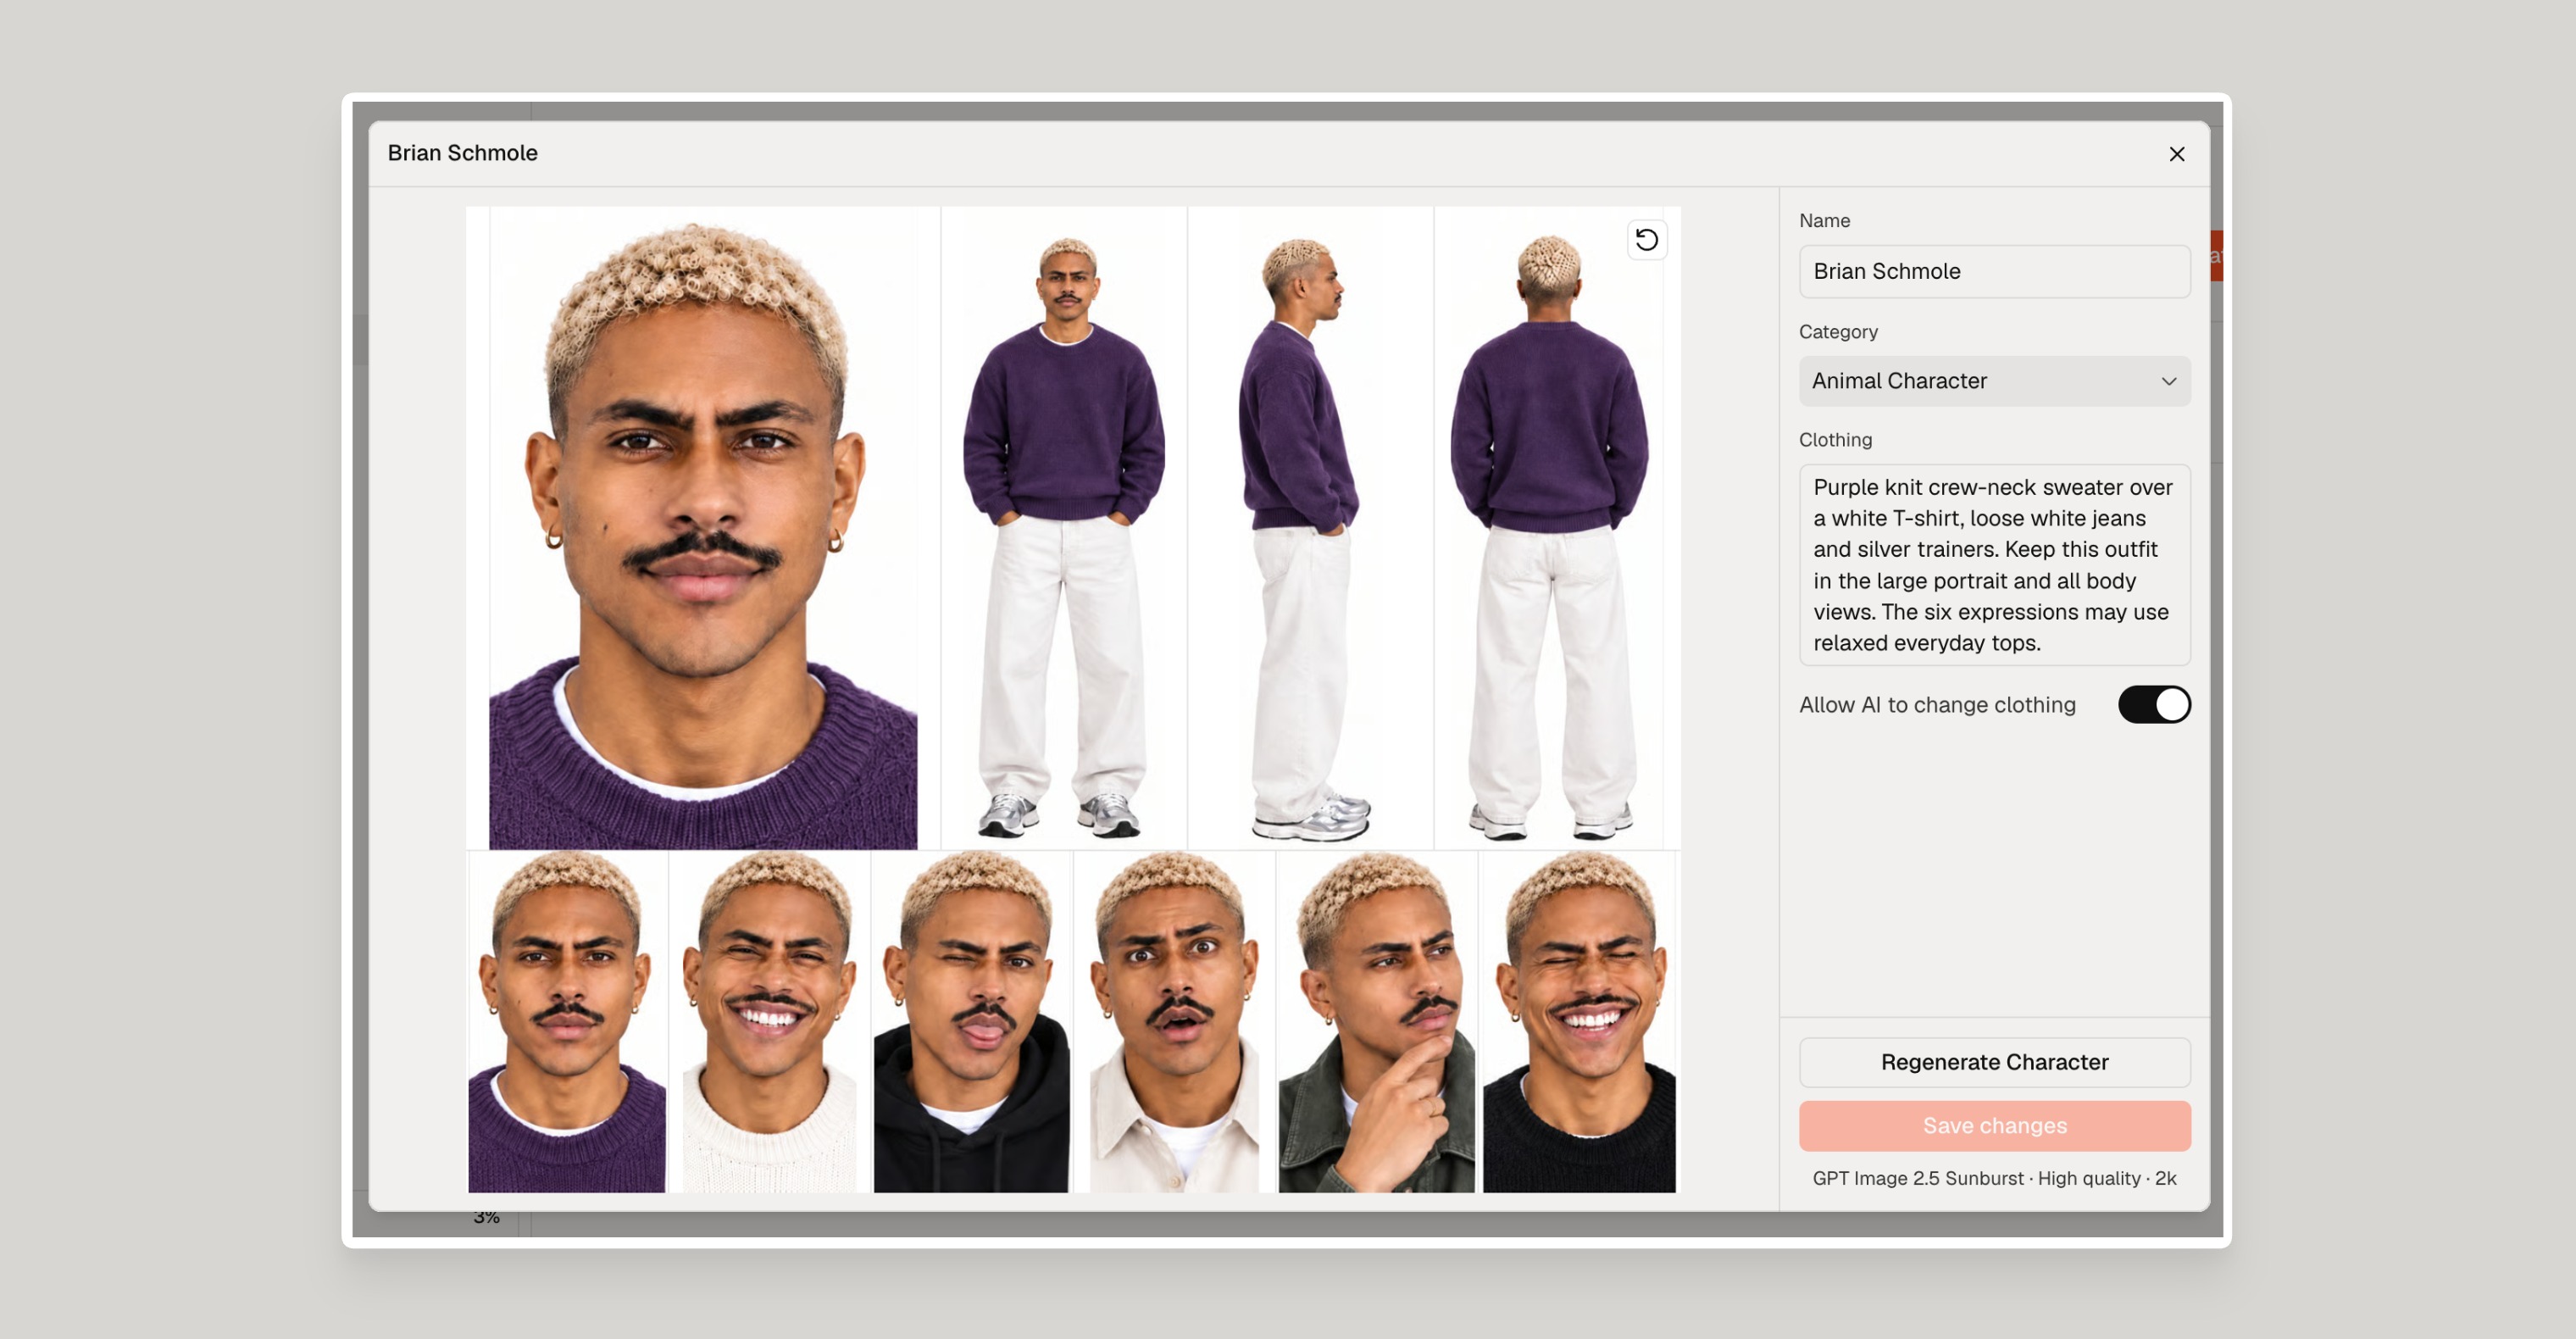
- Characters lock in exactly what a person looks like. From as little as one photo, Studio builds a character profile: a full view of the person from different angles, with different expressions and outfits. Every image goes back to that profile, so the face never drifts.
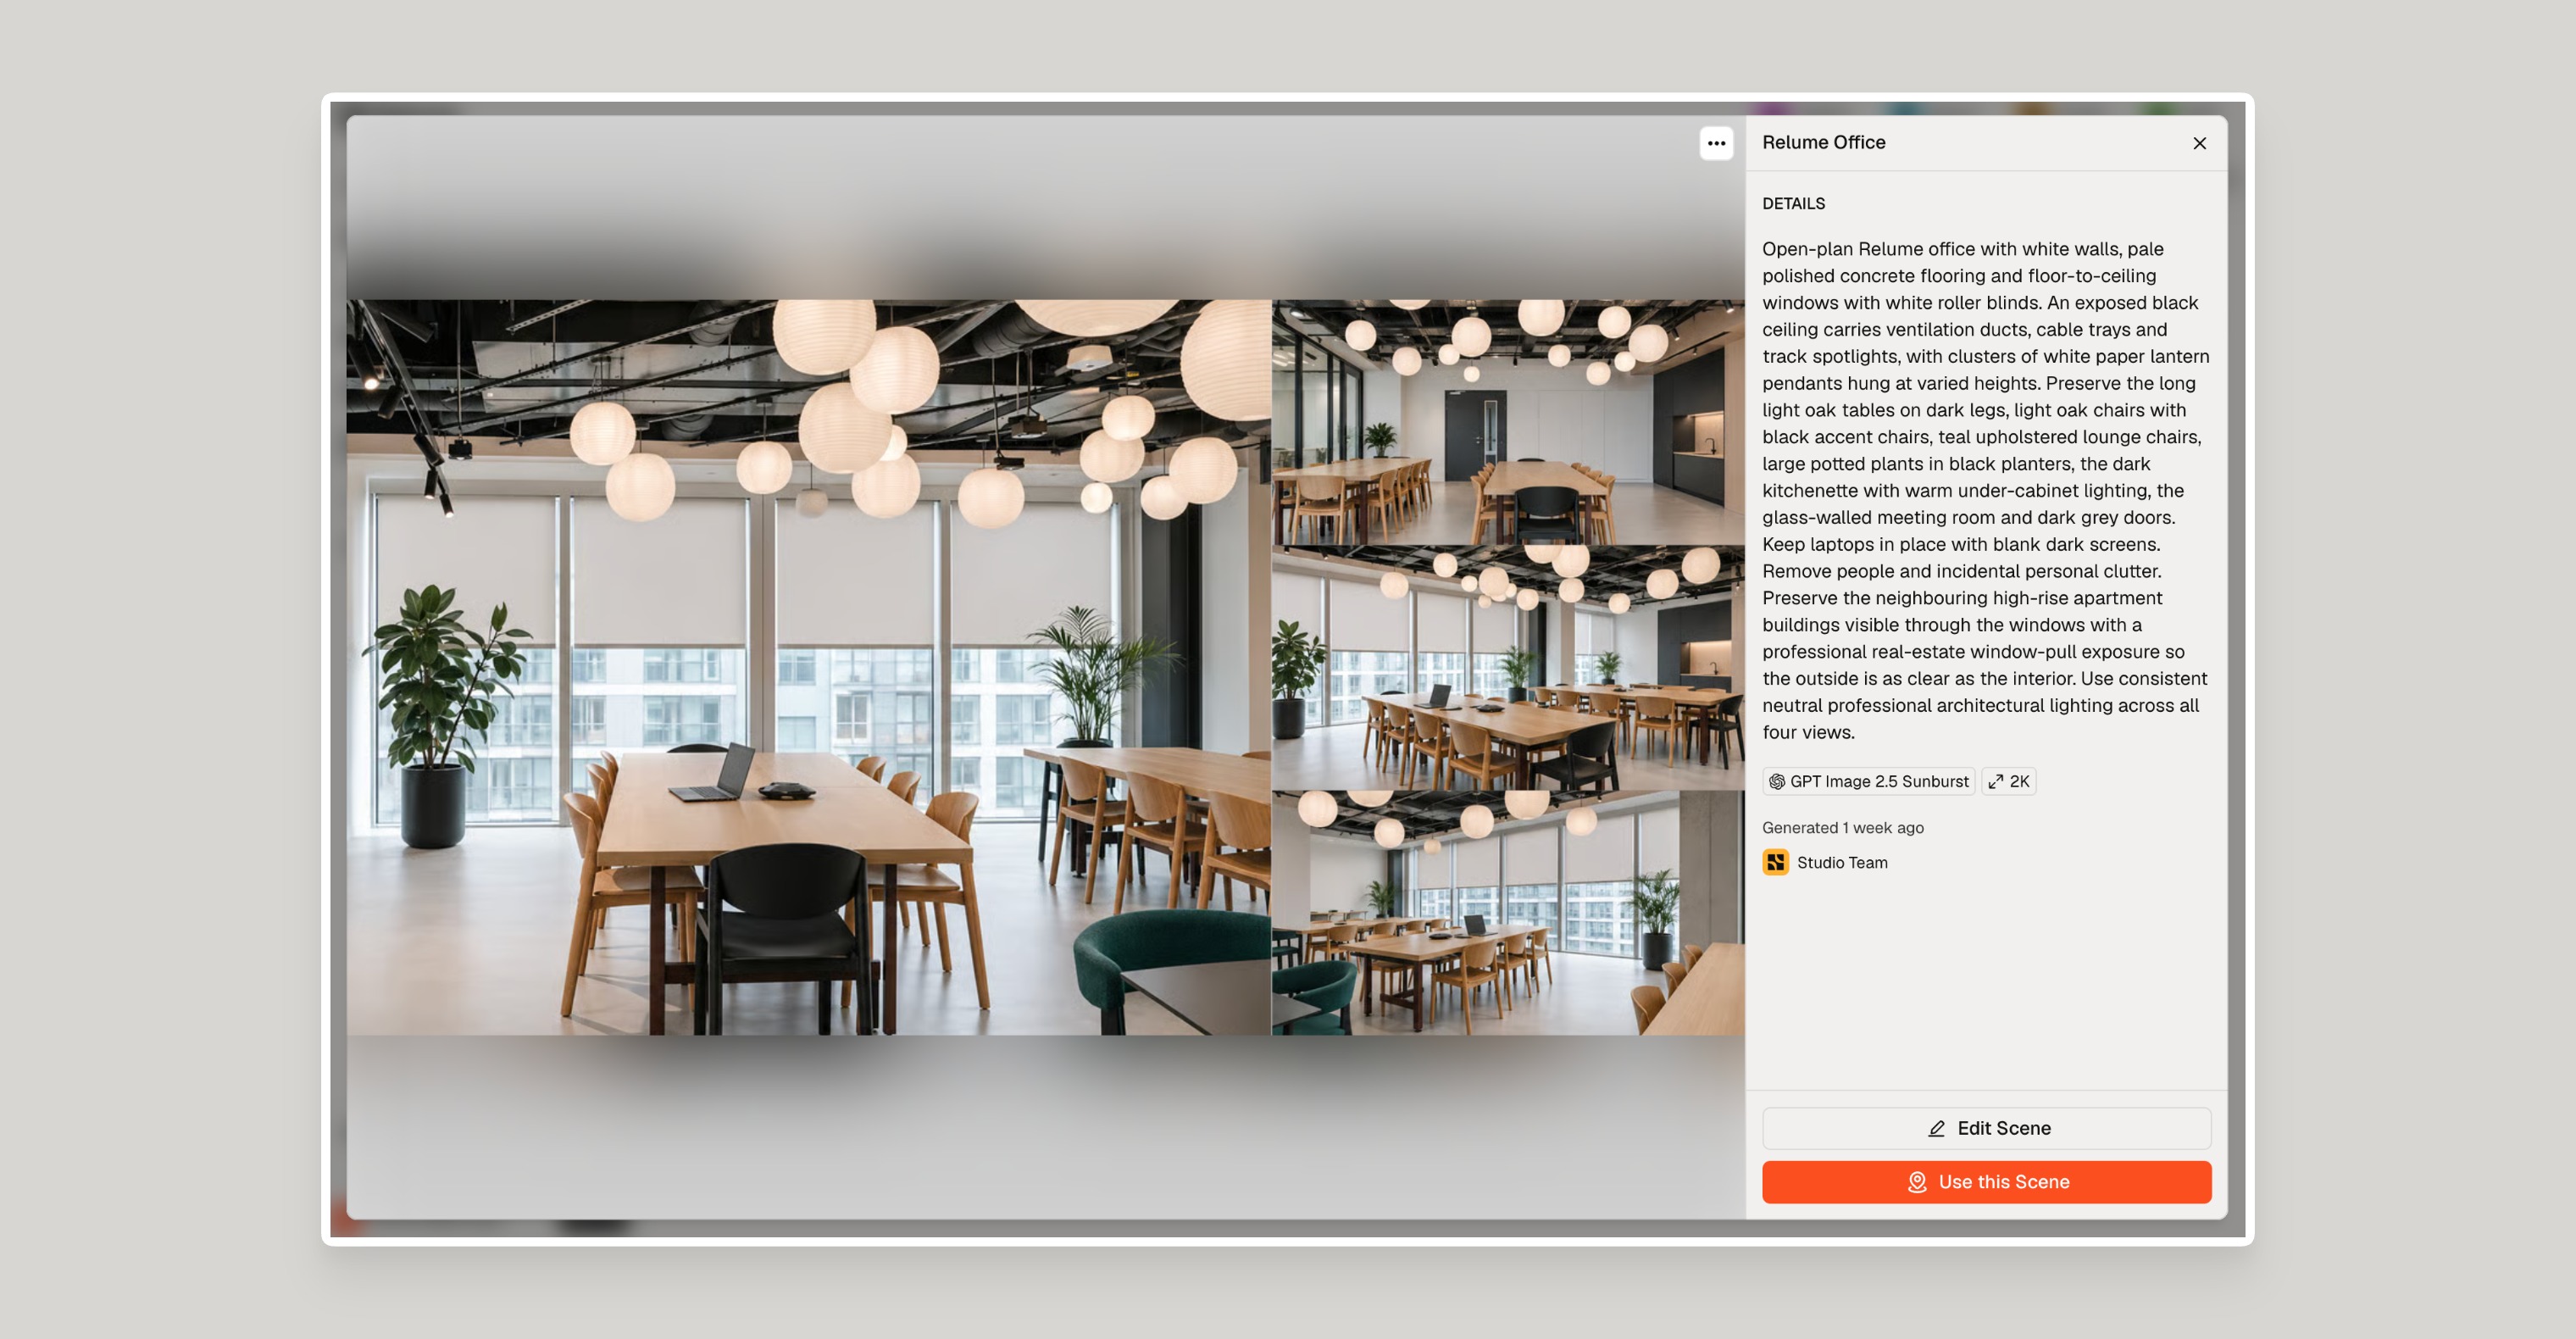
- Scenes lock in a real place, like your café, office or gym. From one photo, Studio creates four views of the space and keeps everything where it actually sits. Your customers see the same room on your website that they walk into in person.
Both follow the same process: upload your photos, let Studio extract the details, review them, then generate.
How to Create a Character
Each Character is one person, so create them one at a time.
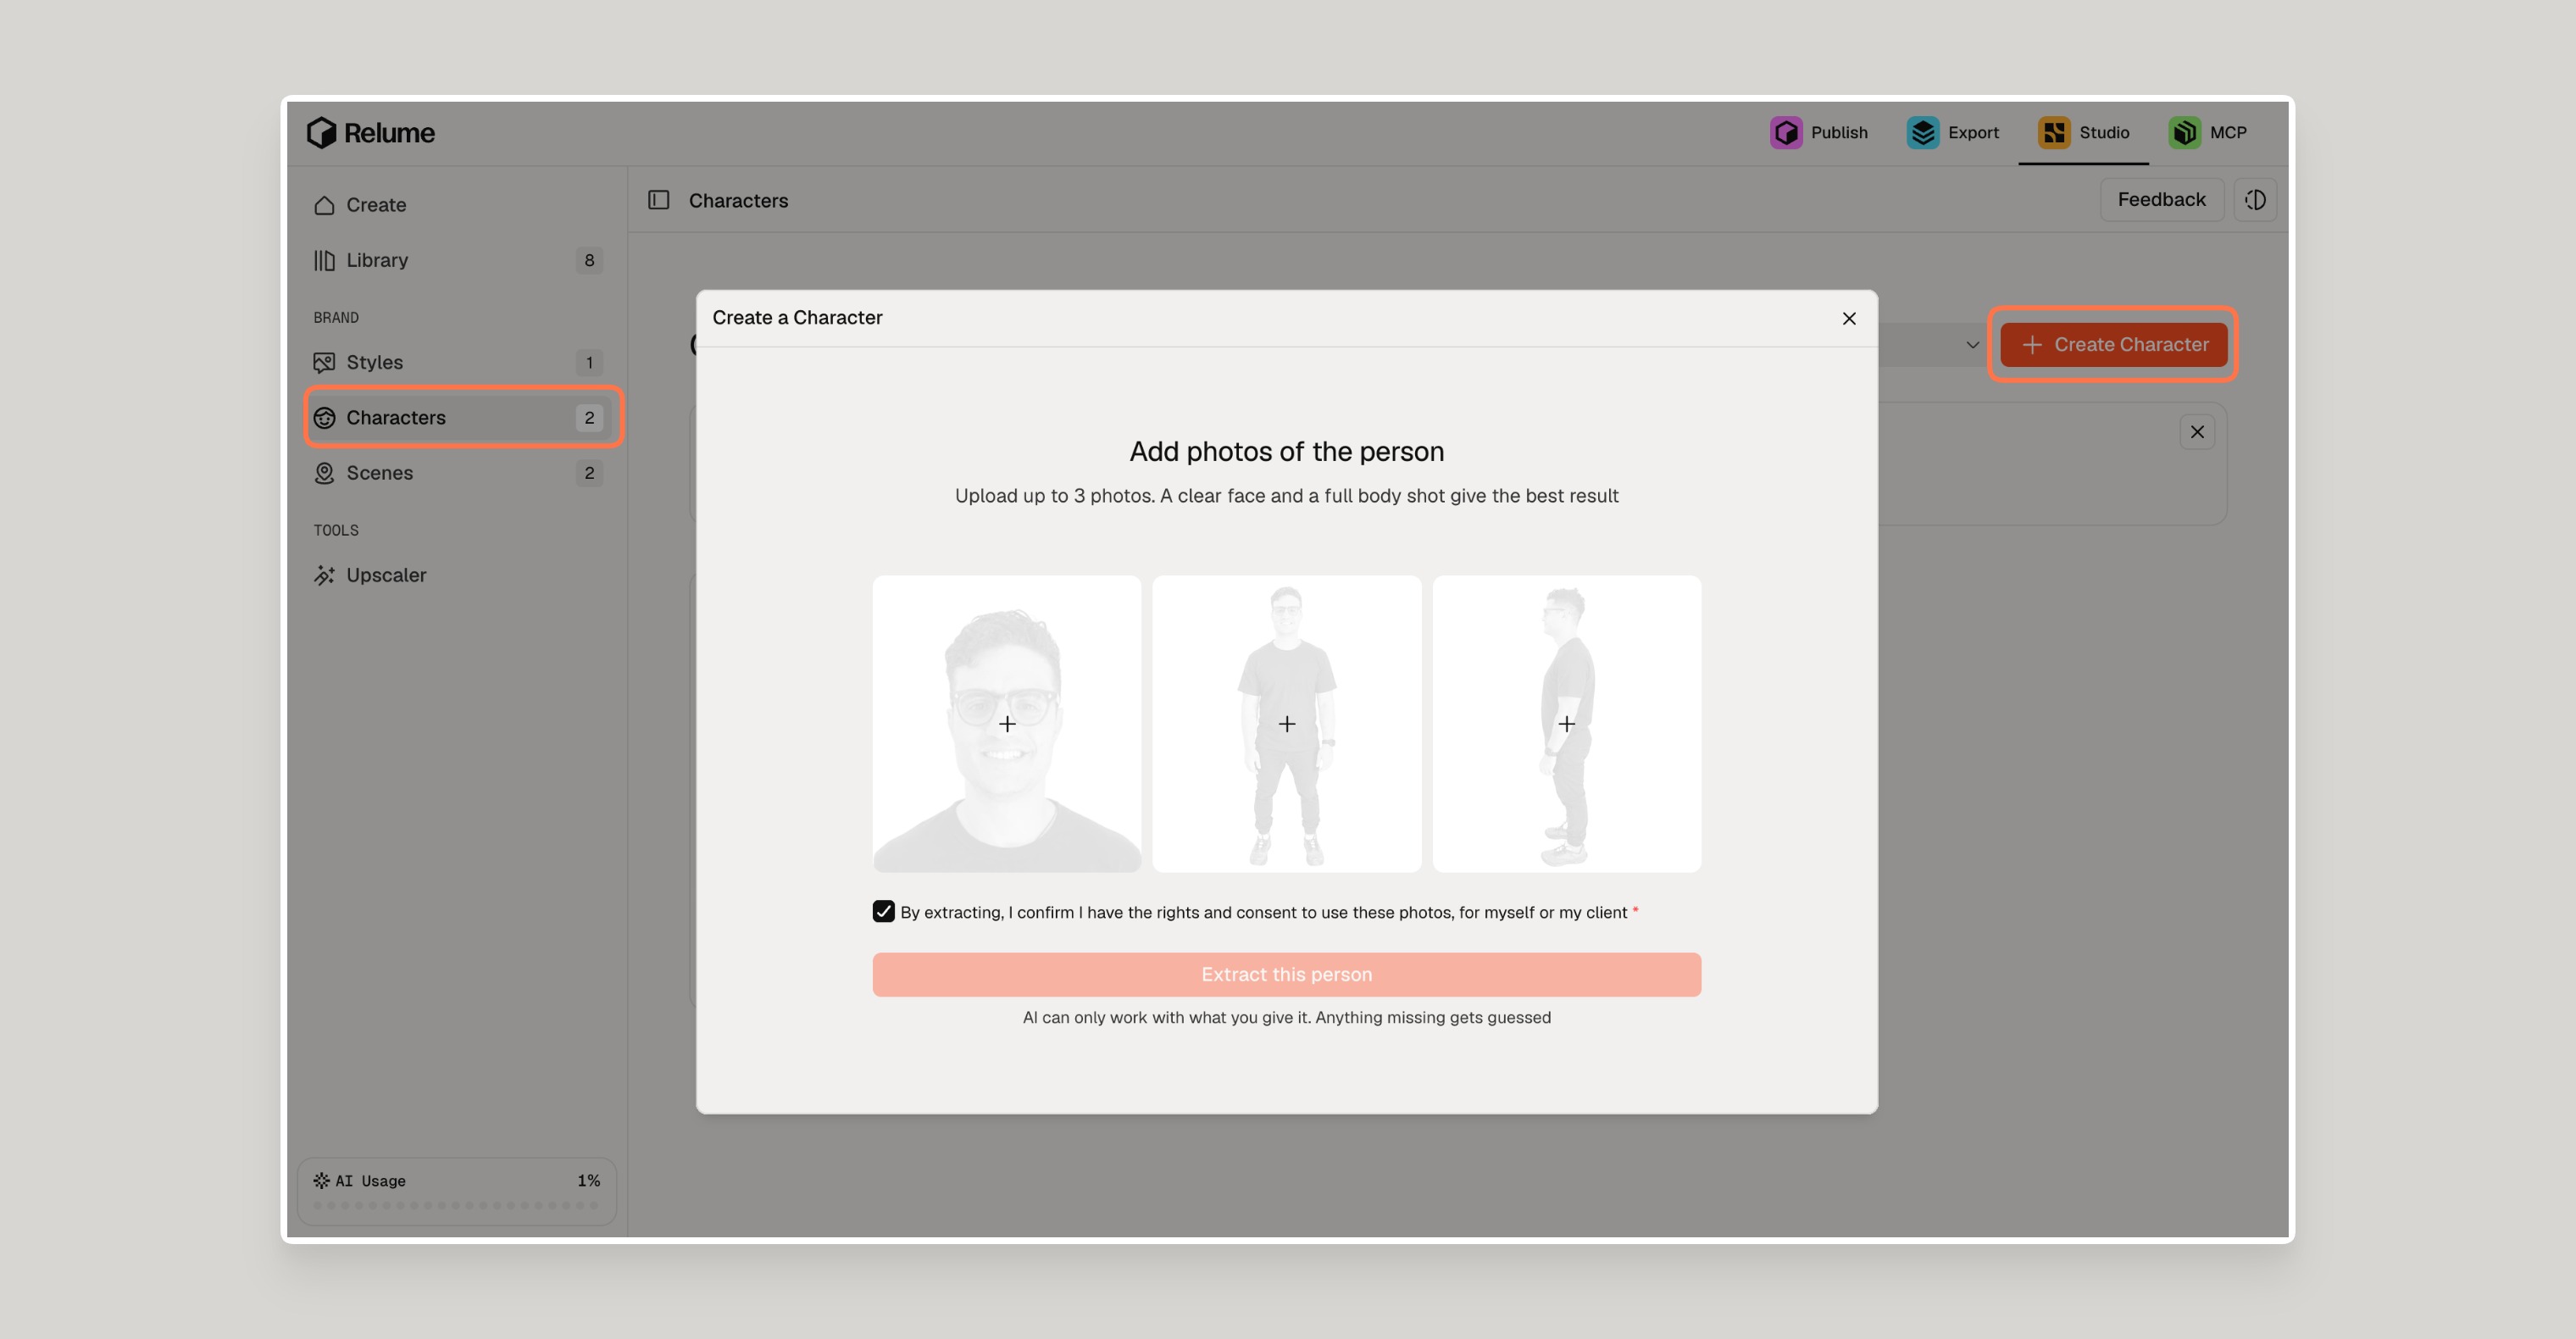
Add Photos of the Person
- Click Characters in the left sidebar.
- Click Create Character in the top-right corner.
- Upload up to 3 photos of the person.
- Tick the box to confirm you have the rights and consent to use these photos.
- Click Extract this person.
Review and Generate Your Character
Studio fills in the person's details and describes what they're wearing.
- Check the Name and edit it if you'd like.
- Check the Category and change it if needed.
- Check the Clothing description.
- Turn Allow AI to change clothing on or off.
- Click Generate Character.
When it's ready, your Character appears in Character Profiles.
Choose Whether Studio Can Change Clothing
- On: Studio dresses the person in outfits that suit their style, based on the clothing description. Use this when you want variety across your images.
- Off: Studio keeps the person in the exact outfit described, in every image. Use this for things like a uniform or a signature look.
Studio can only work with what you give it, and it fills in anything it can't see. One photo works, but a clear face shot and a full-body shot give the most accurate Character.
How to Edit or Regenerate a Character
You can change a Character's name, category and clothing at any time. Save your changes, or regenerate the Character so Studio rebuilds the profile with them.
- Click Characters in the left sidebar.
- Click the Character you want to change.
- Click Edit Character.
- Change the Name, Category or Clothing description as needed.
- Turn Allow AI to change clothing on or off, if needed.
- Click Save changes, or click Regenerate Character to rebuild the Character with your changes.
How to Create a Scene
When you create a Scene, Studio strips the space back to its bare bones. It removes people, clutter and anything written on a whiteboard, so you get a clean version of the room to place your Characters in.
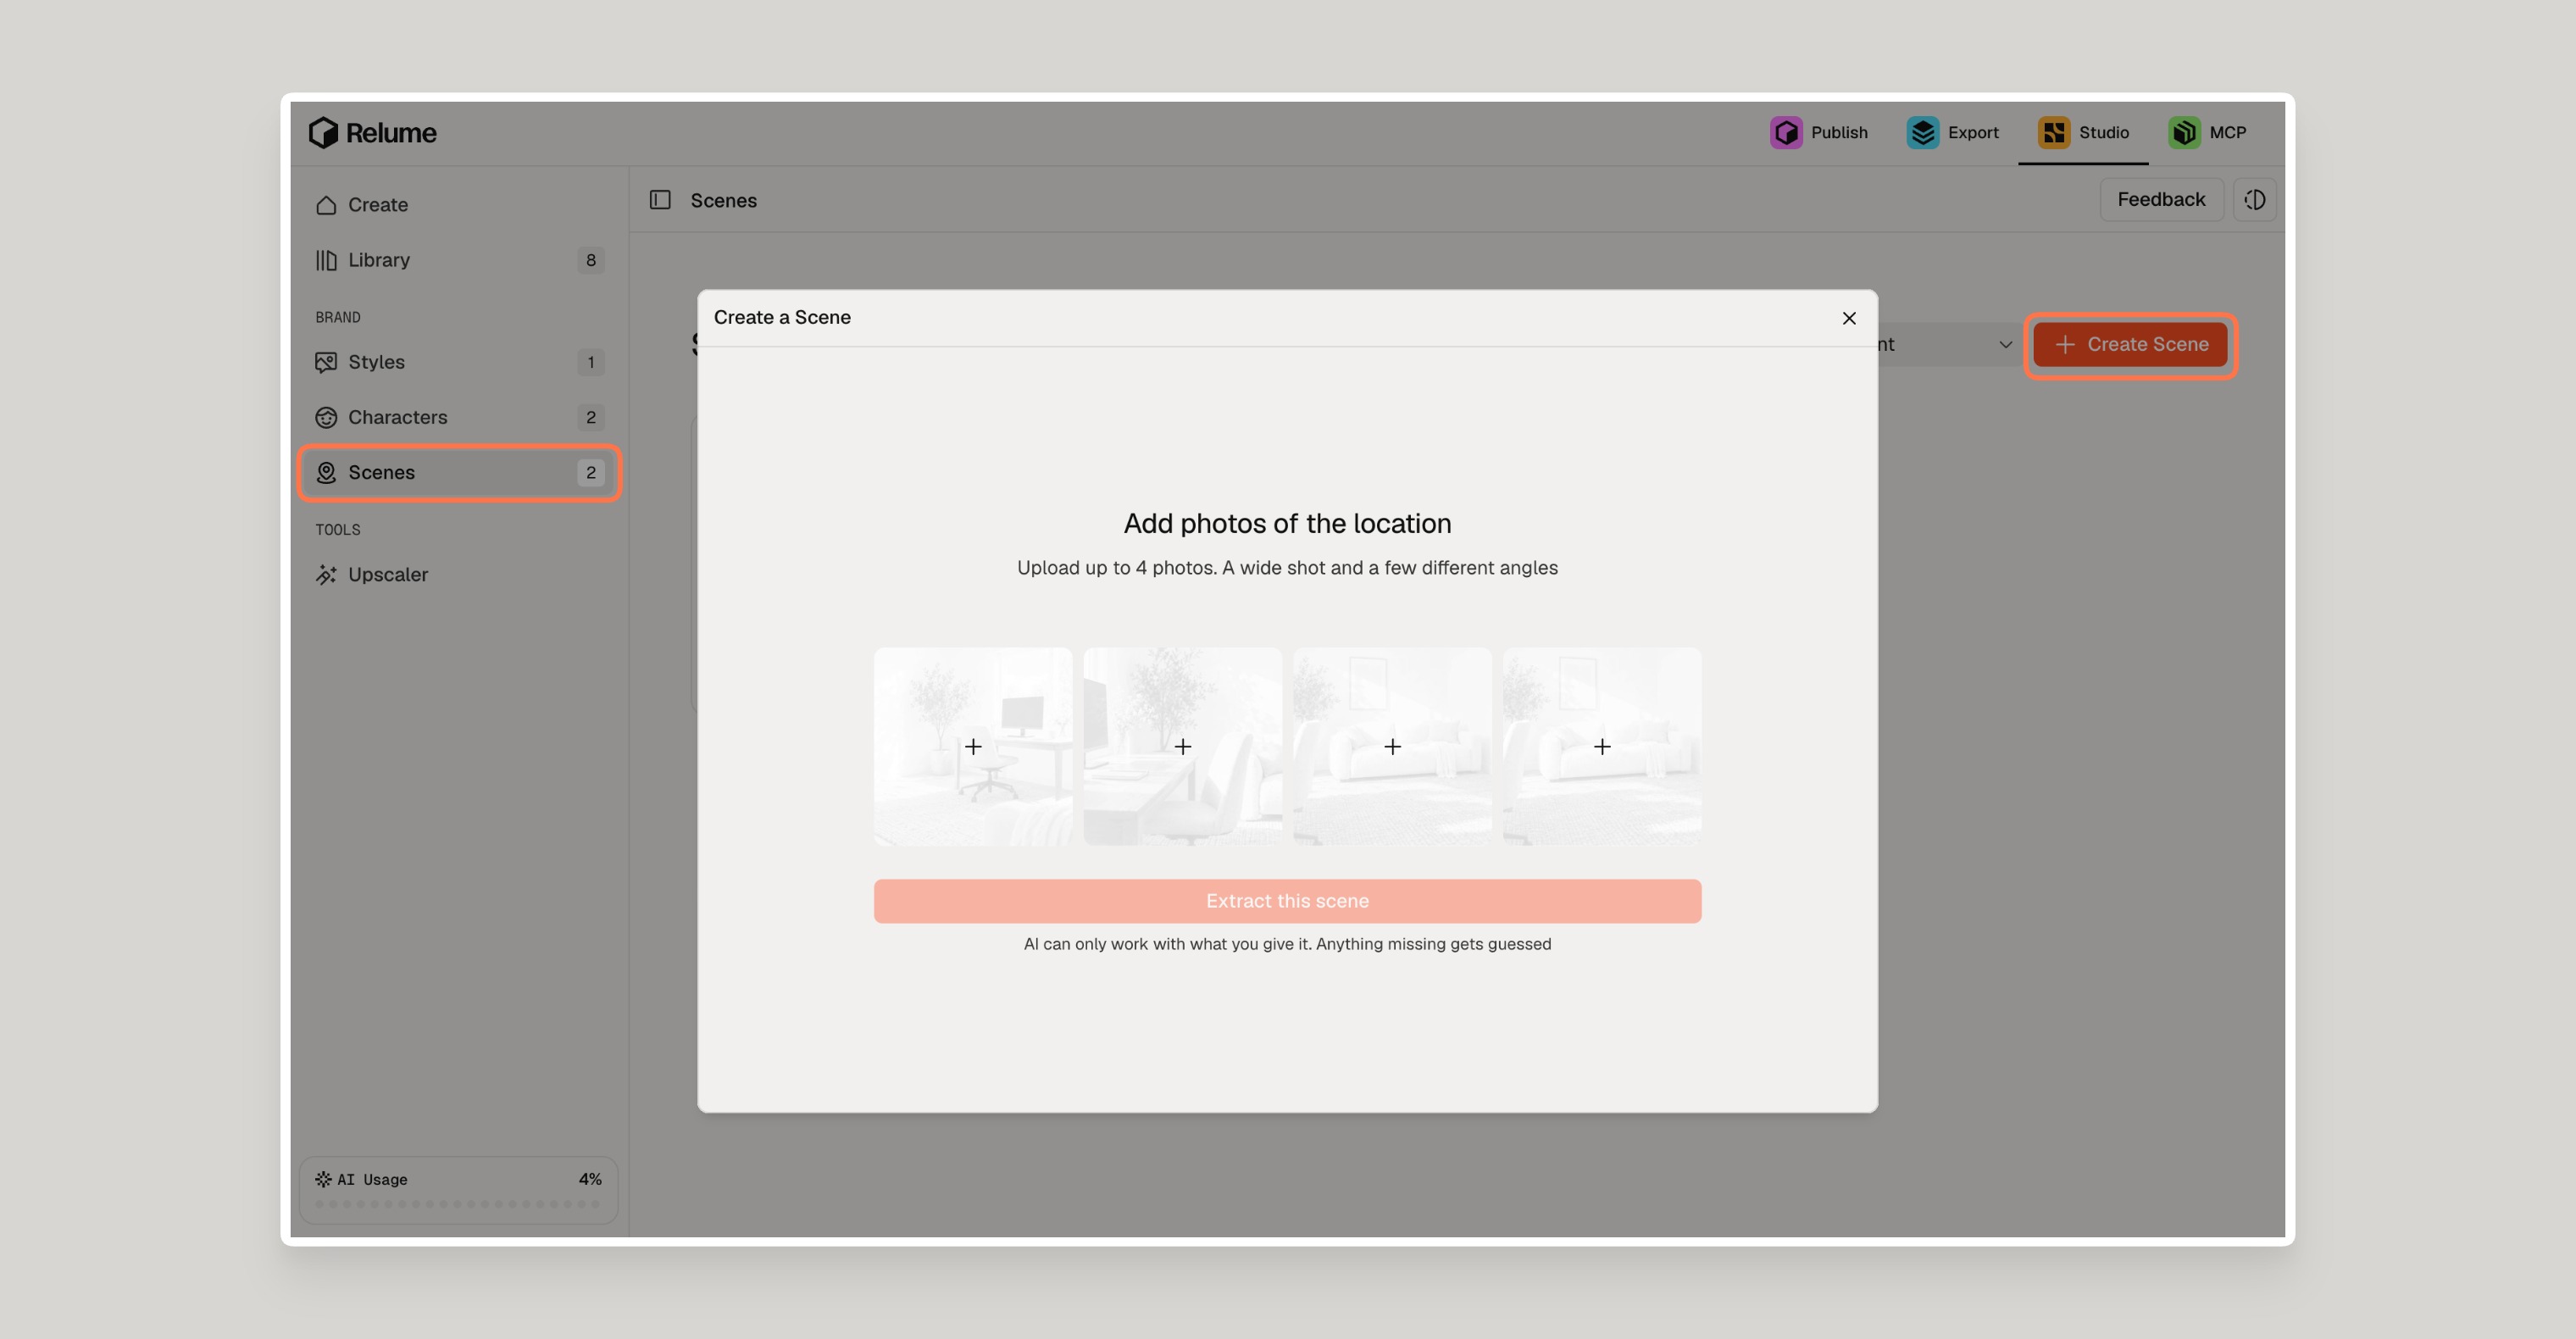
Add Your Photo
- Click Scenes in the left sidebar.
- Click Create a Scene.
- Upload a photo of the space.
- Click the button to extract the scene.
Review and Generate Your Scene
- Check the Name and edit it if you'd like.
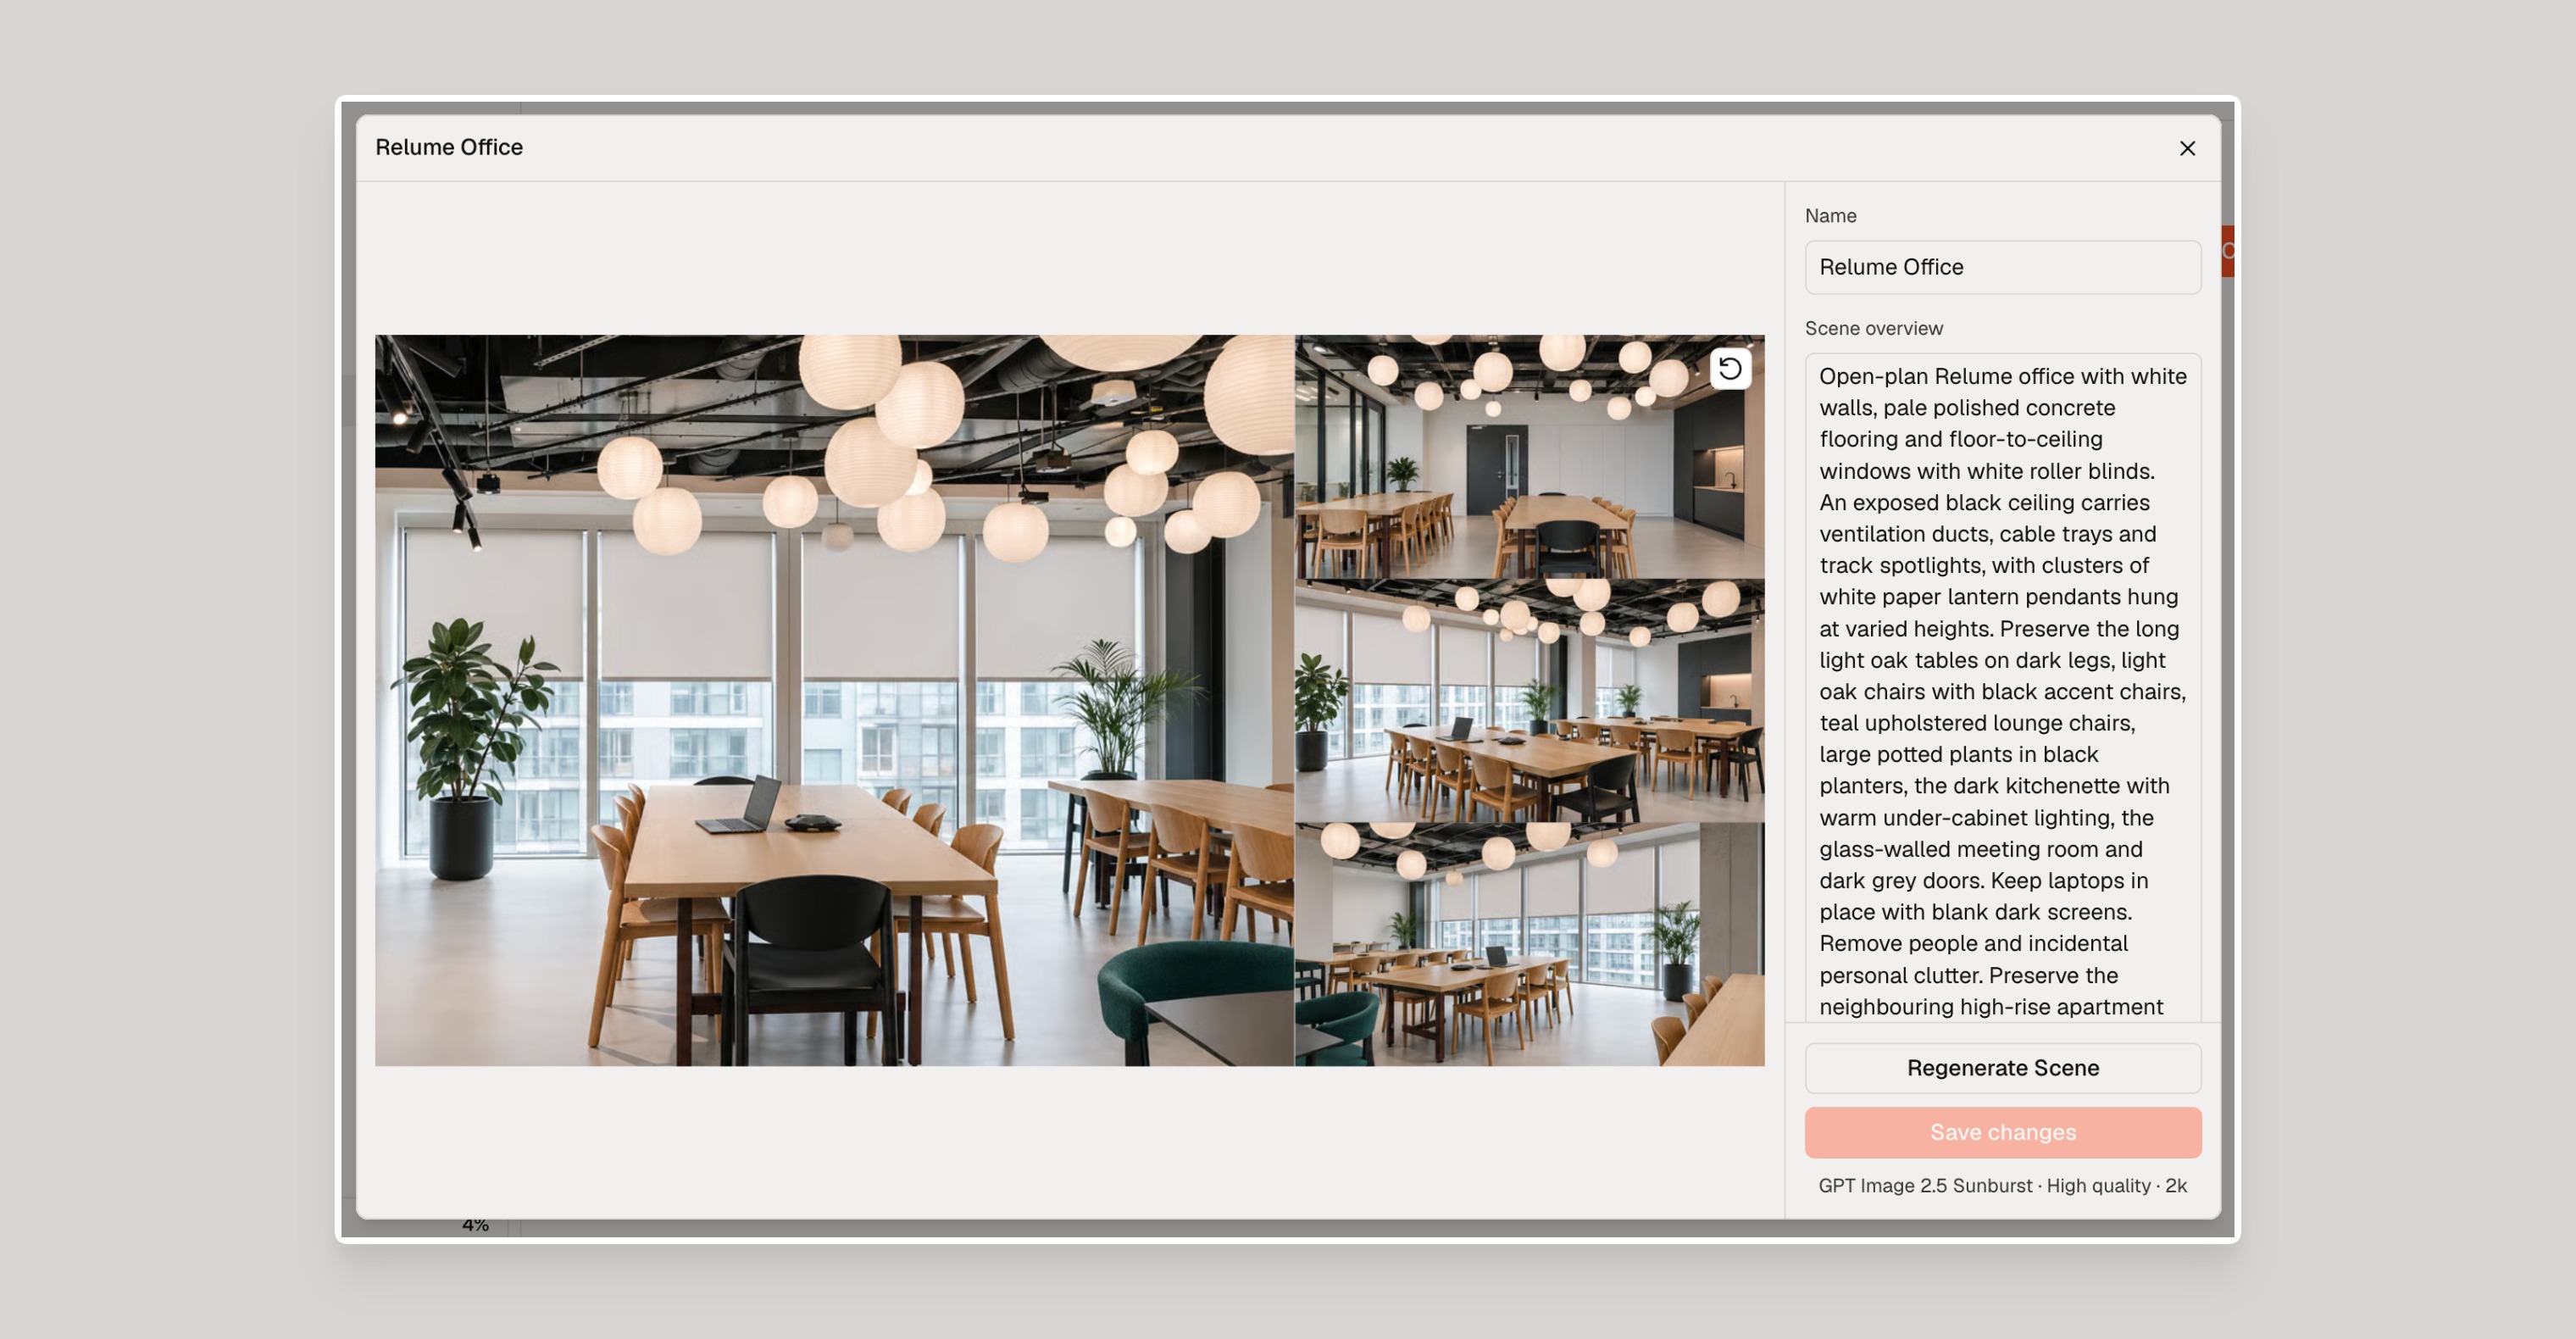
- Check the Scene overview. This describes what Studio will keep in the space, like the counter, the staircase and the lighting.
- Click the button to generate the Scene.
When it's ready, your Scene shows four views of the space.
You can also create a Scene from the composer. Click the Scene dropdown, then click Create a Scene.
How to Edit or Regenerate a Scene
You can change a Scene's name and overview at any time. Save your changes, or regenerate the Scene so Studio rebuilds the views with them.
- Click Scenes in the left sidebar.
- Click the Scene you want to change.
- Click Edit Scene.
- Change the Name or Scene overview as needed.
- Click Save changes, or click Regenerate Scene to rebuild the Scene with your changes.
Need Support?
Join Our Community
Learn from fellow Lumers or showcase your work with our community of 10k+ members.
Get Support
We've got your back. Get your questions answered.
We typically reply in 24 hours or less.

